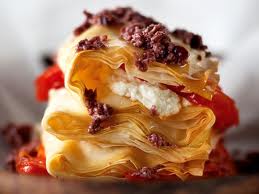
Okay, so the Holidays are pretty much here and everyone must be making plans for what to do, where to shop, what to get, what will the Holiday Menu be like, who's coming, etc, etc, etc, right? This is a pretty safe bet..... but life goes on all around all these happenings and you still have to get the "nuts& bolts" done... so you have to think of maybe you'll be having guests or be just so tired that maybe cooking regular meals will not be your first thought? So why not plan in advance and insure you cut some of the work down and make it easier on yourself.... Making food in advance has always been a good idea, especially for busy families where everyone works and time is tight, but during this time of the year it makes more sense than ever!
Planning for family dinners during this time, taking into consideration that the weather is cold, seems to me this makes it easier for us since hearty soups, stews and comforting meals are just the right thing to offer. Plus these types of meals are the kind that actually benefit from reheating. There's nothing like having a steaming pot of soup waiting for you after a busy day..... Mmmmm! Hits the spot. Or how about having a great casserole ready and waiting to be put in the oven while you change and put away the shopping? It's Tuesday evening, you just got home from work, still have some laundry to get done, you're tired and the family is hungry..... luckily there's a great dinner all ready to be heated up and the work has already been done? Amazing!
It's also a good thing to have some family pleasing dishes on hand that can be made in no time flat during this time too. Shopping in advance, in bulk and having all the ingredients can help make it easy and fast yet still give you and yours, a great family meal any time of the week. You don't have to wait for the Holidays to put these ideas into motion either, everyone's schedule is busy all year round, so they make sense all the time. It's a great time to take advantage of leftovers and recycle as much as possible to bring savings and shortcuts into the mix as well. Nothing wrong with saving a little money, heh?
So let's look at some ideas that maybe will help you during this time of the year......
1- LASAGNA.- Always a good idea and most people love it. Sure, it's work but if you go ahead and make at least 2 of them, you can have one for dinner while you wrap the other one up and freeze it for over the holidays. This is one of those dishes that increases in flavor with the reheating and if you make even more sauce, this can be frozen and used for a quick pasta dinner on another night too. Lasagna is also very flexible and is equally good with meat or vegetarian, with noodles or using zucchini or eggplant instead and save some carbohydrates, any meat can be used and almost any vegetables too. Here's a great version that's easy to make and yields amazing flavor:
Lasagna Noodles (or use thin sliced zucchini or eggplant)
salt & black pepper to taste
1-2 lb ground beef (I used hot Italian sausage instead) but you can use chicken, turkey or pork
1 green bell pepper, de-seeded and chopped
1 onion, small and chopped
3-5 garlic cloves, chopped
1 tsp red pepper flakes
1 cup tomato paste (or use 2 small cans of 6 oz each)
16 oz canned tomato sauce
1/2 - 1 cup red wine
2 tbsp fresh basil, chopped
1 tbsp fresh oregano, chopped
1-2 eggs (2, if you like it fluffy)
15 oz ricotta cheese (you can use cottage cheese instead if you like)
2 tbsp fresh parsley, chopped
16 oz spinach (frozen chopped, thawed and drained) optional
1 lb fresh mushrooms, chopped
8 oz shredded mozzarella cheese
8 oz grated parmesan cheese
Preheat oven to 325 F . Grease a deep 9x13 inch baking pan. If making noodles, follow package instructions and keep them in some water once cooked so they don't stick together. If making vegetarian: Slice zucchini (or eggplant) lengthwise into very thin slices. Sprinkle slices lightly with salt; set aside to drain in a colander while you make the sauce. Don't skip this step or they will be too soft.
To prepare the meat sauce: (or you can leave the meat out of it) Cook and stir ground beef and black pepper in a large skillet over medium high heat for 5 minutes. If too much fat is released, then drain it and leave 2-3 tblsp in the pan to continue cooking. Add in green pepper, onion, red pepper flakes & garlic; cook and stir until meat is no longer pink. Stir in tomato paste, tomato sauce, wine, basil, and oregano, adding a small amount of hot water if sauce is too thick. Bring to a boil; reduce heat and simmer sauce for about 20 minutes, stirring frequently. Meanwhile, stir egg, ricotta, and parsley together in a bowl until well combined.
To assemble lasagna, spread 1/3 of the meat sauce into the bottom of prepared pan. Then layer the noodles to cover well or 1/2 the zucchini slices, 1/2 the ricotta mixture, all of the spinach, followed by all of the mushrooms, then 1/2 the mozzarella cheese. Repeat by layering the remaining meat sauce, noodles or zucchini slices, ricotta mixture, and mozzarella. Spread Parmesan cheese evenly over the top; cover with foil. Bake for 45 minutes. Remove foil; raise oven temperature to 350 degrees F, and bake an additional 15 minutes. Let stand for 5 minutes before serving.
NOTE: If freezing then stop before baking, cool and cover very well with heavy duty aluminum foil and place in the freezer. Either put something on the top to prevent other foods from pressing on this or freeze first and then place other foods over it. You will need additional baking time when finally using it, add about 30 minutes to the first baking time and check to insure it's bubbly before raising the temperature. You can also thaw first before baking to shorten the baking time if you have time to get this done.
*******************************
2- CASSEROLES.- Just like Lasagna, these are very practical and can run the gamut from noodle, potato, rice based dishes with a variety of sauces that can be baked and served. Same goes for Chicken/Beef Pot Pies, Cassoulet, all types of Chili dishes (like Tamale Pie, Texas Chili) and most of all Stews which can be made in advance and be ready for reheating when needed. Here's a great recipe for one of our favorite Chili's: Don't be put off by the ingredients, this is an amazing Chili, you'll love it!
1 tablespoon vegetable oil
2 pounds ground buffalo meat (beef, pork, turkey or chicken) or leave vegetarian
1/2 medium onion, chopped
1 red bell pepper, seeded and chopped
1 green bell pepper, seeded and chopped
1 Poblano or Anaheim pepper, seeded and chopped
1 jalapeño pepper, seeded and chopped (I use Serrano 2-3)
2 cloves garlic, minced
1/4 teaspoon ground cumin
1/2 teaspoon dried oregano
1/4 teaspoon ground coriander
1 tablespoon ancho chile powder
Sea salt, to taste
Ground pepper, to taste
1 (14.5-ounce) can crushed fire-roasted tomatoes
2/3 cup low-sodium beef broth (can use chicken broth or vegetable)
1/2 tablespoon brown sugar
1 tablespoon Worcestershire sauce
1 (7-ounce) can chipotle sauce or 2 tablespoons adobo sauce from a can of chipotles in adobo
1 bay leaf
1 (15-ounce) can black beans, drained and rinsed
1 (15-ounce) can red kidney beans, drained and rinsed
1/3 bunch green onions, green parts only, sliced in rounds, for garnish
Chopped cilantro, for garnish
In a medium sized pot with a lid, heat oil over medium heat and add ground buffalo. Brown meat, breaking large chunks into smaller ones. Cook for about 5 minutes or until all meat is browned. Remove from pot and discard excess fat, leaving about 2 tablespoons.
Bring back to medium heat, add onions, red bell pepper, green bell pepper and Poblano pepper and cook on medium heat for about 5 minutes, scraping bottom from time to time. Add jalapeño pepper and cook for another 3 minutes. Add garlic and then add cumin, oregano, coriander, salt and pepper. Let spices cook for another minute, stirring.
Return browned meat to the pot. Stir in tomatoes and beef broth, brown sugar, Worcestershire sauce, adobo sauce and bay leaf, stir and bring to a boil. Once boiling, taste sauce and adjust salt and pepper to taste. Lower heat to a slow simmer, cover with a lid and cook for about 30 minutes. Add beans and continue simmering, covered, for another 10 minutes or until beans are warmed through.
Serve in bowls and garnish with chopped cilantro and green onions.
NOTE: Spice quantities are just a guide, I use more of everything. I also have beans always on hand but you can use canned to make it easier and faster. Substitute ingredients to suit your taste....
************************************
3- TACOS, BURRITOS, TOSTADAS, SOPES: All these can make leftovers something to look forward to. My family loves them all! Just be sure to have tortillas (either corn or flour, the very best quality you can get so I won't make you make your own) and use leftovers for the fillings, add lettuce, Pico de Gallo, your favorite Salsa and you're done! Go to the nearest Mexican Market to find good quality tortillas, some of them have tortilla factories right inside the market and are made daily. Use up leftover corn tortillas, fried in some oil, for Nachos, Tortilla Soup or Dry Tortilla Soup too.
4- SOUPS: Almost anything can be turned into a soup. Leftover vegetables can be put in the blender with their own liquid, and turned into cream soup. Or use leftover meats, shredded, along with vegetables and some stock, top with some cheese and your're done. Cook some vegetables in some chicken or vegetable stock, either blend or use as is for a quick soup. Add some leftover noodles or rice. You can add some "roux" (equal parts fat/butter with flour, cooked in a pan 3-4 minutes then whisked into a clear liquid, to make a thick and creamy soup). Here's a great way to use leftover turkey or chicken and get a wonderful Main Dish Soup: Turkey Gumbo:
1 tablespoon extra virgin olive oil
2 cloves garlic, finely chopped
1 small yellow onion, chopped
1 (16-ounce) package frozen okra
1 (28-ounce) can diced tomatoes, with their liquid
Turkey, Chicken meat, shredded, about (about 1 pound)
1 cup cooked brown rice
Salt and pepper to taste
Hot sauce to taste
Heat oil in a large pot over medium heat. Add garlic and onion and cook, stirring occasionally, until softened, about 5 minutes. Add peppers, okra, corn and tomatoes and stir well. Add the meat and bring to a boil. Insure liquid covers everything, if more liquid is needed add stock or water. Cover, reduce heat and simmer, stirring occasionally, cook at least 20 minutes. Stir in rice, salt, pepper and hot sauce and cook about 10 minutes more.
NOTE: Once you have the ingredients in your pantry, this hearty soup comes together quickly to give you a complete meal. You could also cook a turkey leg in the soup if it's raw (nestle in the soup, cook about 60-90 minutes, insuring it's covered by liquid), then pull out, shred, return meat to the pot and finish by adding the rice and the rest of the ingredients. Same goes for chicken.
********************************
Be sure to use the search bar shown above to look for other alternatives that you might be able to use during this time, there's plenty of recipes here. Get the kids to help, thaw frozen casseroles in the fridge while you're at work so they're ready once you return home, save leftovers thinking ahead with other meals in mind, buy vegetables thinking of hearty and quick soups for another day..... It's never been so important to save your energy yet have something yummy and fast. Who doesn't like that, right?
Wishing everyone a lovely Holiday Season!..........
A cooking blog about it all..... come with me on a journey of discovery.... living in Mexico or in the US, traveling the world while learning what food is all about or just trying to "amp up the flavor" of it all!
Showing posts with label Vegetarian. Show all posts
Tuesday, December 6, 2011
Friday, November 4, 2011
Bread Pudding..... Do you know how many kinds you can have?
Bread Pudding.... What does it mean to you? Did you know that most cultures on this earth have their own version of this popular comfort food? From Creole to French, Italian to Mexican and Spain, everyone developed a tasty way to deal with left-over hard bread. Bread has always been considered "the staff of life" so cultures of old showed its respect by never throwing out the bread, instead transforming it into everything from salad, like the Italian Panzanella, to soup as is used in Spain with Gazpacho and their version of the pudding called "Migas".... Mexico has the ever popular "Capirotada" which is a traditional dish containing both sweet and savory flavors for the holidays.... in other words, and in all languages, the trick is to conserve, recycle, make do and fix it up but under no circumstances is it a good idea to throw food out.
Bread Pudding, while most people think of it like a dessert, doesn't have to be sweet at all, but since we're starting with the sweet let's talk about it a while. Using a thick egg based custard base, flavored with cinnamon, nutmeg, ginger and allspice, a lot of times raisins, nuts, fruits and liquors of all types become part of this as well. Ice cream can be seen topping it as well as heavy cream, Pastry Cream, Vanilla Sauce, Bourbon Sauce and on and on and on.....like Lemon Curd or Dulce de Leche or Chocolate Croissant with Nuts..... what's your favorite? Do tell.....
While Bread Pudding doesn't have to be sweet, the savory brother of this hearty and flavorful dish can be quite a creation too. How about a Baby Spinach, Cream and Garlic Bread one? or a Spinach - Shitake one? How about Mushroom, Leek and Parmesan Bread Pudding.... or a Artichoke Heart, Asparagus & Mozzarella one? A Spring Onion and Goat Cheese one? Any combination you can come up with will make a great one. The base is very much like the one used for Quiche, except that it fills the spaces in between the bread and jells in the same firm-soft manner, so any accessories that you add to it are enhanced by the amalgamation that happens in the oven. Love that word because it's so perfect for what happens here.So which kind will you make? Here's some prime examples for you to try......
GOAT CHEESE AND SPRING ONION BREAD PUDDING.- Tangy, lemony and very satisfying. You can make it ahead of time in either a casserole dish or in individual ramekins and have them ready when you are!1 lb sourdough bread, crust removed, cut into cubes
5 tablespoons butter
3 bunches of green onions, cut into 1/2-inch portions
2 garlic cloves, finely chopped
Kosher salt and freshly ground pepper
4 large eggs
1 1/2 cups heavy cream
3/4 cup sour cream
1 tablespoon chopped basil
1- 10 oz log of goat cheese, crumbled
Preheat the oven to 400F. Put the bread cubes on a baking sheet and toast in the oven for 10 minutes, or until golden.
In a large pan, melt the butter over medium-high heat. Add the green onions and garlic and cook, keep stirring until the scallions are beginning to get tender, 2- 3 minutes. Season with salt and pepper. Set aside.
In a large bowl, whisk the eggs with the heavy cream and sour cream. Gently fold in the bread cubes, green onions, basil and half the goat cheese. Season with salt and pepper. Let rest until the liquid has been absorbed, about 30 minutes. Pour the bread pudding into a baking dish and sprinkle the rest of the goat cheese on top. Put the baking dish inside a roasting or larger pan and add enough hot water to the pan to reach halfway up the side of the baking dish. (like when making custard, in a bain marie).
Bake for 40 minutes, or until the pudding is set and the top is golden brown. Serve hot or warm.
NOTE: The unbaked bread pudding can be refrigerated overnight. Bring to room temperature before baking. Take into consideration the size of the vessel you're using, it can either add to the baking time or reduce it substantially.....
******************************
LEMON CURD BREAD PUDDING.- Oh so lemony and fresh, you must try this one!
1 loaf of brioche, about 1.4 lbs, crusts removed, bread sliced 1/2 inch thick1 quart whole milk
3/4 cup sugar
4 large eggs
1 1/2 teaspoons lemon zest, minced
3 tablespoons fresh lemon juice
Lemon Curd
1 cup heavy cream
Preheat the oven to 350F. Line the bottom and sides of a 12-by-16-inch jelly-roll pan with aluminum foil and coat with cooking spray. Arrange the brioche slices in the prepared pan, fitting them in a snug single layer, insuring a good fit.
In a medium heavy saucepan, combine the milk with 1/4 cup plus 2 tablespoons of the sugar and bring to a simmer. In a medium bowl, whisk the eggs with the remaining 1/4 cup plus 2 tablespoons sugar. Whisk 1 cup of the hot milk into the eggs, then whisk in the remaining hot milk until thoroughly blended, tempering the mix. Add the lemon zest and slowly whisk in the lemon juice. Pour the custard mixture evenly over the brioche and soak for 10 minutes.
Bake the brioche on the middle rack of the oven for 30 minutes, turning the pan after 15 minutes. Transfer the pan to a cooling rack and let the bread pudding cool to room temperature, about 1 hour. Refrigerate until chilled, 1 hour.
Line a 10-by-5-inch loaf pan with plastic wrap, allowing 3 inches of plastic to hang over the edge. Lightly coat the inside of the plastic wrap with cooking spray. Trim 1/2 inch off the edges of the bread pudding. Cut the bread pudding into three 5-by-11-inch strips. Gently press 1 strip of the bread pudding into the loaf pan, on the bottom. Spread 3/4 cup of the Lemon Curd evenly over the bread pudding. Repeat to form a second layer of pudding and top with more curd, making a second layer. Press the last piece of bread pudding on top, sealing the whole thing. Cover with the overhanging plastic wrap and refrigerate overnight.
In a medium bowl, beat the heavy cream until stiff. Fold in the remaining 1/2 cup of Lemon Curd. Uncover the bread pudding and turn it out onto a serving plate; remove the plastic wrap. Using a hot knife, slice the bread pudding 3/4 inch thick, top with a dollop of the lemon whipped cream and serve.
NOTE: You can fold the whipped cream with other flavors that complement the Lemon Curd as well, I like blueberry compote but I've also used Apple and Pear Compotes too which work beautifully. You could also leave a plain whipped cream or add some sugar to it, you could also add some Vanilla Sugar or Cinnamon as well.
**********************************So next time you're wondering what to do with that loaf of bread that's too hard to use.... and you're about to toss it out, remember this post and look in your fridge or pantry.... you could have your own little masterpiece right before your very eyes. It's very satisfying to come up with an amazing dish made from scraps or leftovers you thought was done..... go ahead and enjoy it.
Whether it's a Bread Pudding, Quiche, Pizza, Casserole, Pie, Calzone, Pasta or Rice Dish that will integrate those "odds and ends" is up to you, but there are so many creative and wonderful ways to make use of it all, you'll need a long time before running out of ideas..... go ahead and give it a try, you'll be glad you did!
Wouldn't some of these make excellent additions to your Holiday Table? MMmmmm.......
Labels:
American Fare,
Desserts,
From France,
Fusions,
Holidays,
Italian Dishes,
Lunch,
Recipes from Mexico,
Spain,
Vegetarian
Sunday, October 23, 2011
Aaahhhh..... Comfort Food!
Comfort food means different things to different people. Sure, that makes sense, since we all had unique views on life growing up, our influences were different and as such, the result will be too. BUT, there are certain things that spell C O M F O R T to all of us and hit just the right notes, right?For the most part Comfort Food used to mean fattening, heavy, indulgent and unhealthy- but why should it? In today's much more health conscious world where nutrition plays a more prominent place in our lives along with practicality and budget sense, Comfort Food can bring you amazing flavors while still taking care of your other concerns, all it takes is a little thought and the results can be fabulous!
What does Comfort Food mean to you? Is it something that evokes childhood flavors from a kinder, gentler time? Does it remind you of a wonderful place? Is the texture and mouth feel important? Smooth flavors or kicked up taste, which do you prefer? It all depends on what you're used to, of course, but with so many amazing foods now readily available at your local A&P, there are no limits to what you "feel like".....
It also doesn't mean you need to buy expensive imported ingredients to get the taste and quality you're looking for either, there are plenty of domestic products that are excellent and will allow you to satisfy your cravings while still keeping an eye on the family budget. If you consider the ideas I've enclosed, they can take the place of heavier more expensive meals so you could actually end up saving some money to boot!What else spells comfort? Grilled Cheese Sandwiches! Done the whole way..... Great Pizza made with excellent crust. Amazing fresh pasta done the way real Italians make it in Italy, not drowning in sauce with flavor plus! A really well made Hamburger could also spell comfort, super French Fries, sure! Crispy, amazing Fried Chicken? Why not. A gooey, tasty Lasagna? MMmmmm!..... Mashed potatoes, flaky biscuits, the list could be never ending. How about a decadent French Onion Soup Gratinee? (YES!), a Chocolate Souffle? An amazing Tangine or Bisteya? YES! YES!..... there are no rules and we can each make a list of dozens of favorites..... what's your choice?
Here are some ideas for an easy yet amazing choice in Grilled Cheese Sandwiches which you can make for any weekday meal or even turn a weekend into a special day. Watching the game? How about a Brunch idea with some soup and a great cup of coffee? A romantic midnight supper with some Proseco? Get a great Artisanal Bread, the perfect cheese or blend of cheeses you prefer, some extras and you're on your way. Want some ideas? Read on...........
THE AMAZING GRILLED CHEESE:
1- Sourdough Bread with Cheddar, Havarti and Monterrey Jack Cheese.
2- Whole Wheat Bread with White Cheddar (or Cheese Curds), Prosciutto and Tomato Marmalade
3- Walnut Bread with Gruyere and Ham
4- Twelve Grain Bread with Goat Cheese, Caramelized Onions and Greens
5- White Bread with Pulled Pork and Brie Cheese with a touch of Apricot Preserves
6- Wheat Bread, Cheddar Cheese, Guacamole and Bacon
7- Sourdough Bread, Oaxaca Cheese and Chorizo
8- Wheat Breat, BBQ Chicken and Monterrey Jack
9- Ciabatta Bread, Roasted Red Peppers and Feta Cheese with Spinach
10- White Bread, Gouda Cheese, Black Bean Humus, Guava Jam and Pickled Jalapenos
11- Seven Grain, White Cheddar, Bacon and Roasted Cherry Tomatoes
12- Wheat Bread, Sharp Cheddar and Roasted Asparagus
13- White Bread, Spicy Crab Dip and Colby Cheese
14- White Bread, Provolone, Turkey Breast and Honey Mustard Sauce
15- Wheat Bread, Swiss Cheese, Tuna Salad
16- White Bread, French Brie, Mushrooms and Truffles
17- Wheat Bread, Fontina, Emmenthaler and Gruyere with dressed greens
18- Nut Bread, Cheddar and Gruyere Cheese and Basil with Tomato
19- Ficelle Bread, Ham, Salami and Cheddar
20- Multigrain Bread, Fontina Cheese with Bacon and Tomato
21- Focaccia, Mozzarella and Fontina Cheeses with some Olive Tapenade
22- Wheat Bread, Chihuahua Cheese, Roasted Peppers and Onions with some Arugula
HOW ABOUT SOME SOUP?

Roasted Tomato Soup.- The perfect company for your sandwich, easy to make and perfect!
3 lbs ripe tomatoes
1 tablespoon plus 1 teaspoon extra-virgin olive oil
3/4 teaspoon sugar
Salt and freshly ground pepper
3 tablespoons minced shallots (or use yellow onions)
About 2 3/4 cups chicken stock or canned low-sodium broth
Preheat the oven to 325°. Halve the tomatoes lengthwise through the stem; quarter larger tomatoes. In a medium bowl, toss the tomatoes with 1 tablespoon of the olive oil to coat. Arrange the tomatoes, cut side up, on a large baking sheet and sprinkle with the sugar and salt and pepper. Roast the tomatoes for about 2 hours, or until most of their juices have evaporated and they are just beginning to brown. The tomatoes should look like dried apricots and hold their shape when moved.
Heat the remaining 1 teaspoon of olive oil in a small skillet. Add the onions, cover and cook until they are soft and just beginning to brown, about 5 minutes. Transfer the onions to a food processor or blender, add the tomatoes and puree. With the machine on, drizzle in the chicken stock and process until well incorporated. Pass through a sieve to insure it's really smooth, serve hot. Can be topped with some shredded cheese or a dollop of sour cream.
****************************
How to go about grilling a sandwich? You can butter the outside of your sandwich or use mayo. You need a hot pan and sometimes instead of butter I just use some vegetable oil, about 1 or 2 tablespoons and lay the sandwich directly over the oil or fat instead of putting it directly on the bread. Keep watching it so it doesn't burn since it toasts quickly. Turn and repeat on the other side. If you have a Panini Grill, this works great or you can also use a bacon press if you like your sandwiches this way. If you're going to add greens or anything that you don't want cooked or heated, open the sandwich after grilling and add them. You can prepare fillings that will be added in advance, like roasted peppers, asparagus, etc. add them and then grill.Or make the best use of leftovers by using them as add on's to your grilled sandwich! Anything will work and it's great as long as you like it!
Since the weather is beginning to change, I'm working on some warming soup ideas to share, keep checking back, I'll be posting these soon..... My best to everyone!
Saturday, July 9, 2011
Height...... Makes all the difference in presentation....
It is oft
en said that baking is science while cooking is art, I believe it. In the first you follow formulas, if you don't get the right "ratios", your results won't be good. It's all about how one element reacts with another giving the desired effect, but in cooking you get so much freedom and leeway that "your" creativity, style and passion have a chance to interpret ingredients and take them to places maybe no one has taken them before and if you add artistic sensibility to this, well, a dish presentation can be brought to "art". Indeed.
We have an old saying: "El amor entra por los ojos".... which means: "Love enters through the eyes" and if you apply this to Culinary Arts it definitely means that dish presentation or "plating" occupies a very important role in whatever you cook because if it's not well presented on the plate, taking into consideration colors, textures, ingredients, accents and most especially, height.... you could turn what could be an amazing dish that everyone wants to eat into a so-so meal that won't excite anyone. It could mean the difference between success and failure (or a good grade vs. a failing one if you apply this to Culinary training), or in the business world, could mean a popular selling offering that can deliver profits and acclaim. Who doesn't like great looking food?
You can get technical on the aspect of food presentation and there are several schools of thought on this from the "minimalist" to "architectural", "contemporary", "European", "classic", etc. that can get pretty involved and Culinary students are trained in so they can best recognize and produce successful "platings". You need to select the correct plate for the dish you are presenting, professionals prefer white plates in bold shapes (lik
e you see in prominent restaurants), since white shows off the food better and busy plates tend to obscure the food. One of the Master Chefs that trained me taught me to "think with the results in mind". Think of the colors of your food, the main element, the sauce, the garnishes and how they will all come together to be pleasing not just to the taste but to the eye as well.
For the past couple of years there has been another element that has taken an important place in plating food: height. Now it's all about the height of the dish and how you can bring height into your dishes to better present them. Adding height to a dish makes for a bold statement drawing attention to the elements on the plate, creates interest plus it directs your sight exactly where you want it to go. So now you're asking yourself, how do I start? what will I need? how involved will all this be?
Never fear, these are easy to make, practical to serve and all you need is your imagination and some items. To make these little projects work you will need to use a free hand or maybe some empty cans of different sizes. Cut the tops and bottoms off (I have a can opener that cuts the outside of the can leaving a clean line and the tops to re-use), wash them really well (or you can use professional rings like the ones shown), molds, have vegetable spray on hand and your ingredients. Basics are: For Binders and to hold things together (yet don't go too wet or the stack will crumble): rice, pasta, avocado, couscous, potato, quinoa, wontons, cookies, crepes, etc. Then you will use any vegetable, meat, fish, cheese, fruit, seasonings or sauces you've planned on.
Now stacking food is not new, a long time ago "Timbales" or even "Terrines" functioned in this way by layering ingredients, adding texture and color to have a beautiful result. Same here, just with a new, more modern spin..... so let's see what we can come up with, ok? By the way, I love these, find them fun to do and enjoy showing them off. It never fails when you have company over or you do these for your family, once they see them.... they're impressed and delighted!
Here's an easy, pretty one: Zucchini Confetti Stack.- Lovely colors and a light texture combine to make a most attractive appetizer or side dish.
4 zucch
ini
1 sweet red bell pepper
½ cup whipping cream
½ cup shredded Swiss cheese
2 large fresh eggs
1 tablespoon olive oil
salt and pepper
Slice zucchini lengthwise, thinly, save the middle two slices from each one. Chop the rest. Steam or blanch all zucchini and carefully remove the middle slices and dry on paper towel. Strain rest of zucchini until dry. Dice the red pepper finely and saute in the olive oil, until soft. Make a mixture with all of the ingredients, minus the middle slices and half of the pepper dice.
Butter, oil or spray your molds. Place in each mold two slices of the zucchini, arranging them as a cross on the bottom of the mold and up the sides. Fill the mold with the mixture and bake the in water bath for approximately 20 minutes at 400F degrees. Carefully invert them on individual plates. Sprinkle them with the saved pepper dice. You could serve with a little sauce, aioli if you like or you could add some shrimp, crab meat or ?
******************************
Avocado, Sweet Potato and Quinoa Salad.- The flavors coalesce to bring you amazing colors and an amazing dish!
1 cup quinoa, cooked in vegetable stock and cooled to room temperature
1/2 jalapeño, minced
1/4 cup plus 1 tablespoon fresh cilantro, minced
1 sweet potato, peeled and cut into 1/4-inch dice
5 tablespoons extra-virgin olive oil
Sea salt and freshly ground black pepper
Canola Oil
2 corn tortillas, cut into 1/4-inch strips
1 teaspoon Cajun seasoning
Juice of one lime
2 tomatillos in olive oil, skins removed
1 tablespoon rice vinegar
1 teaspoon light agave nectar
2 avocados, diced
In a medium bowl place quinoa, jalapeño, 1 tablespoon cilantro, 1 tablespoon extra-virgin olive oil, lime juice, and salt and pepper to taste, and toss to combine. Preheat the oven to 400F. In a small bowl, toss the sweet potatoes with 2 teaspoons olive oil, and season with salt and pepper to taste. Spread a single layer on a baking sheet and roast for 15 minutes, or until soft in the middle and lightly browned; be careful not to let the sweet potatoes burn.
Lower the oven temperature to 350F. In a small bowl, toss the tomatillos with 1 teaspoon of olive oil. Place on a baking sheet and roast for 15 minutes. Transfer to a food processor, add the vinegar, 1/4 cup cilantro, and agave nectar, and pulse to combine. With the motor running, pour in the remaining 3 tablespoons olive oil in a thin stream. Continue blending until emulsified. Season with salt and pepper to taste. Pour 2 inches of canola oil into a small, heavy pot and heat until the oil shimmers. Add the tortilla strips and fry until crisp and browned, 1 to 2 minutes. Drain on paper towels and sprinkle with Cajun seasoning.
Place a 3-inch mold in the center of one of 4 salad plates. Fill with 1/4 of the quinoa mixture and press down with a spoon to pack the mold, smoothing the top. Place 1/4 of the sweet potato pieces on top of the quinoa and press down gently. Top with 1/4 of the avocado and press down gently. Carefully remove the mold. Repeat on the remaining salad plates. Carefully place 2 tortilla strips parallel to each other about 1 inch apart on top of each. Place 2 more tortilla strips perpendicular on top of those. Top them with the microgreens and drizzle the dressing around.
***************************
Asian Crab Stack with Tomato Gazpacho.- Lovely color and sophisticated flavors, in other words, a hit!
Crab Salad:
4oz white crab meat
1/4 cup crème fraiche
1 tbs Dijon grain mustard
1tsp mayonnaise
1tbs chopped chives
Mix the ingredients together and chill
Salsa:
½ mango diced
2 avocados diced
1tsp finely chopped chile (no seeds)
1tbs chopped coriander
1tbs finely chopped red onions
1tbs lime juice
1tsp chopped pickled ginger
Mix all the ingredients together and keep in the fridge
Gaspacho:
4 vine ripe tomatoes
1 clove of garlic
1 spring of tarragon
1 spring of basil
1 red pepper
1 cucumber with skin off and seeds off
1 red chilli chopped with the seeds
1 tbs cherry vinegar
½ juice of a lemon
olive oil
Salt to taste
Put all the vegetables in a blender and process until smooth, strain through a fine sieve and finish with the olive oil, vinegar and lemon juice. Season and put in the fridge. Now build the stack in metal rings, first add the salsa then the crab mix and top it up with cream fraiche to seal.
Serve it with the gazpacho, very cold, and a drizzle of olive oil.
*********************************
You can also build these "free form" without the use of molds or cans just by using things like Phyllo Dough, Fried Wontons, crepes, blinis, grilled veggies, tomato or bell pepper slices since you use these to make the "levels"..... then you add one ingredient, top it off with a sauce or cream or cheese, add another level and so on.... done in a jiffy and looks incredible! Here is an example:
Phyllo, Salmon, Onion and Greens Salad.- A wonderful first course or an elegant supper.....
Phyllo, baked to a golden brown with butter, add some pine nuts and dill, 4 in squares
Onion, caramelized in butter and oil until deep brown. Add some sugar and balsamic vinegar
Have the salmon sliced and ready
Goat cheese in thin slices, 1/8" thick, chilled
Chives, chopped, chilled and 2 left long for garnish
Microgreens, mixed greens, mesclun
Vinaigrette of your choice
Sour Cream
Caviar
When you're ready to assemble and serve (these don't keep well so be ready to serve), cut the phyllo diagonally into triangles. Select your plates and lay them out. Line your plates with the greens that have been lightly tossed in your vinaigrette. Place a phyllo triangle on top of the greens in the center. Top with salmon and 1 tbl of the onion. On goes another phyllo triangle, this time pointing the tips in another direction as the first. A slice of cheese now goes on top, followed by salmon and onions. The third phyllo triangle goes on, facing the points in another direction, the last slice of salmon now is placed with another tablespoon of onions.
To garnish, put some sour cream, caviar, sprinkle with some chives, and some pine nuts. Drizzle a little vinaigrette over everything and rest 2 whole chive spears on the side of the stack so they point upward. Serve.
**************************************
So now you're asking: "just salads?", "vegetables only?"..... Of course not, here are some combinations you can try:
For appetizers or starters:
t:
en said that baking is science while cooking is art, I believe it. In the first you follow formulas, if you don't get the right "ratios", your results won't be good. It's all about how one element reacts with another giving the desired effect, but in cooking you get so much freedom and leeway that "your" creativity, style and passion have a chance to interpret ingredients and take them to places maybe no one has taken them before and if you add artistic sensibility to this, well, a dish presentation can be brought to "art". Indeed.We have an old saying: "El amor entra por los ojos".... which means: "Love enters through the eyes" and if you apply this to Culinary Arts it definitely means that dish presentation or "plating" occupies a very important role in whatever you cook because if it's not well presented on the plate, taking into consideration colors, textures, ingredients, accents and most especially, height.... you could turn what could be an amazing dish that everyone wants to eat into a so-so meal that won't excite anyone. It could mean the difference between success and failure (or a good grade vs. a failing one if you apply this to Culinary training), or in the business world, could mean a popular selling offering that can deliver profits and acclaim. Who doesn't like great looking food?
You can get technical on the aspect of food presentation and there are several schools of thought on this from the "minimalist" to "architectural", "contemporary", "European", "classic", etc. that can get pretty involved and Culinary students are trained in so they can best recognize and produce successful "platings". You need to select the correct plate for the dish you are presenting, professionals prefer white plates in bold shapes (lik
e you see in prominent restaurants), since white shows off the food better and busy plates tend to obscure the food. One of the Master Chefs that trained me taught me to "think with the results in mind". Think of the colors of your food, the main element, the sauce, the garnishes and how they will all come together to be pleasing not just to the taste but to the eye as well.For the past couple of years there has been another element that has taken an important place in plating food: height. Now it's all about the height of the dish and how you can bring height into your dishes to better present them. Adding height to a dish makes for a bold statement drawing attention to the elements on the plate, creates interest plus it directs your sight exactly where you want it to go. So now you're asking yourself, how do I start? what will I need? how involved will all this be?
Never fear, these are easy to make, practical to serve and all you need is your imagination and some items. To make these little projects work you will need to use a free hand or maybe some empty cans of different sizes. Cut the tops and bottoms off (I have a can opener that cuts the outside of the can leaving a clean line and the tops to re-use), wash them really well (or you can use professional rings like the ones shown), molds, have vegetable spray on hand and your ingredients. Basics are: For Binders and to hold things together (yet don't go too wet or the stack will crumble): rice, pasta, avocado, couscous, potato, quinoa, wontons, cookies, crepes, etc. Then you will use any vegetable, meat, fish, cheese, fruit, seasonings or sauces you've planned on.
Now stacking food is not new, a long time ago "Timbales" or even "Terrines" functioned in this way by layering ingredients, adding texture and color to have a beautiful result. Same here, just with a new, more modern spin..... so let's see what we can come up with, ok? By the way, I love these, find them fun to do and enjoy showing them off. It never fails when you have company over or you do these for your family, once they see them.... they're impressed and delighted!
Here's an easy, pretty one: Zucchini Confetti Stack.- Lovely colors and a light texture combine to make a most attractive appetizer or side dish.
4 zucch
ini1 sweet red bell pepper
½ cup whipping cream
½ cup shredded Swiss cheese
2 large fresh eggs
1 tablespoon olive oil
salt and pepper
Slice zucchini lengthwise, thinly, save the middle two slices from each one. Chop the rest. Steam or blanch all zucchini and carefully remove the middle slices and dry on paper towel. Strain rest of zucchini until dry. Dice the red pepper finely and saute in the olive oil, until soft. Make a mixture with all of the ingredients, minus the middle slices and half of the pepper dice.
Butter, oil or spray your molds. Place in each mold two slices of the zucchini, arranging them as a cross on the bottom of the mold and up the sides. Fill the mold with the mixture and bake the in water bath for approximately 20 minutes at 400F degrees. Carefully invert them on individual plates. Sprinkle them with the saved pepper dice. You could serve with a little sauce, aioli if you like or you could add some shrimp, crab meat or ?
******************************
Avocado, Sweet Potato and Quinoa Salad.- The flavors coalesce to bring you amazing colors and an amazing dish!
1 cup quinoa, cooked in vegetable stock and cooled to room temperature
1/2 jalapeño, minced
1/4 cup plus 1 tablespoon fresh cilantro, minced

1 sweet potato, peeled and cut into 1/4-inch dice
5 tablespoons extra-virgin olive oil
Sea salt and freshly ground black pepper
Canola Oil
2 corn tortillas, cut into 1/4-inch strips
1 teaspoon Cajun seasoning
Juice of one lime
2 tomatillos in olive oil, skins removed
1 tablespoon rice vinegar
1 teaspoon light agave nectar
2 avocados, diced
In a medium bowl place quinoa, jalapeño, 1 tablespoon cilantro, 1 tablespoon extra-virgin olive oil, lime juice, and salt and pepper to taste, and toss to combine. Preheat the oven to 400F. In a small bowl, toss the sweet potatoes with 2 teaspoons olive oil, and season with salt and pepper to taste. Spread a single layer on a baking sheet and roast for 15 minutes, or until soft in the middle and lightly browned; be careful not to let the sweet potatoes burn.
Lower the oven temperature to 350F. In a small bowl, toss the tomatillos with 1 teaspoon of olive oil. Place on a baking sheet and roast for 15 minutes. Transfer to a food processor, add the vinegar, 1/4 cup cilantro, and agave nectar, and pulse to combine. With the motor running, pour in the remaining 3 tablespoons olive oil in a thin stream. Continue blending until emulsified. Season with salt and pepper to taste. Pour 2 inches of canola oil into a small, heavy pot and heat until the oil shimmers. Add the tortilla strips and fry until crisp and browned, 1 to 2 minutes. Drain on paper towels and sprinkle with Cajun seasoning.
Place a 3-inch mold in the center of one of 4 salad plates. Fill with 1/4 of the quinoa mixture and press down with a spoon to pack the mold, smoothing the top. Place 1/4 of the sweet potato pieces on top of the quinoa and press down gently. Top with 1/4 of the avocado and press down gently. Carefully remove the mold. Repeat on the remaining salad plates. Carefully place 2 tortilla strips parallel to each other about 1 inch apart on top of each. Place 2 more tortilla strips perpendicular on top of those. Top them with the microgreens and drizzle the dressing around.
***************************
Asian Crab Stack with Tomato Gazpacho.- Lovely color and sophisticated flavors, in other words, a hit!
Crab Salad:

4oz white crab meat
1/4 cup crème fraiche
1 tbs Dijon grain mustard
1tsp mayonnaise
1tbs chopped chives
Mix the ingredients together and chill
Salsa:
½ mango diced
2 avocados diced
1tsp finely chopped chile (no seeds)
1tbs chopped coriander
1tbs finely chopped red onions
1tbs lime juice
1tsp chopped pickled ginger
Mix all the ingredients together and keep in the fridge
Gaspacho:
4 vine ripe tomatoes
1 clove of garlic
1 spring of tarragon
1 spring of basil
1 red pepper
1 cucumber with skin off and seeds off
1 red chilli chopped with the seeds
1 tbs cherry vinegar
½ juice of a lemon
olive oil
Salt to taste
Put all the vegetables in a blender and process until smooth, strain through a fine sieve and finish with the olive oil, vinegar and lemon juice. Season and put in the fridge. Now build the stack in metal rings, first add the salsa then the crab mix and top it up with cream fraiche to seal.
Serve it with the gazpacho, very cold, and a drizzle of olive oil.
*********************************
You can also build these "free form" without the use of molds or cans just by using things like Phyllo Dough, Fried Wontons, crepes, blinis, grilled veggies, tomato or bell pepper slices since you use these to make the "levels"..... then you add one ingredient, top it off with a sauce or cream or cheese, add another level and so on.... done in a jiffy and looks incredible! Here is an example:
Phyllo, Salmon, Onion and Greens Salad.- A wonderful first course or an elegant supper.....
Phyllo, baked to a golden brown with butter, add some pine nuts and dill, 4 in squares
Onion, caramelized in butter and oil until deep brown. Add some sugar and balsamic vinegar
Have the salmon sliced and ready
Goat cheese in thin slices, 1/8" thick, chilled

Chives, chopped, chilled and 2 left long for garnish
Microgreens, mixed greens, mesclun
Vinaigrette of your choice
Sour Cream
Caviar
When you're ready to assemble and serve (these don't keep well so be ready to serve), cut the phyllo diagonally into triangles. Select your plates and lay them out. Line your plates with the greens that have been lightly tossed in your vinaigrette. Place a phyllo triangle on top of the greens in the center. Top with salmon and 1 tbl of the onion. On goes another phyllo triangle, this time pointing the tips in another direction as the first. A slice of cheese now goes on top, followed by salmon and onions. The third phyllo triangle goes on, facing the points in another direction, the last slice of salmon now is placed with another tablespoon of onions.
To garnish, put some sour cream, caviar, sprinkle with some chives, and some pine nuts. Drizzle a little vinaigrette over everything and rest 2 whole chive spears on the side of the stack so they point upward. Serve.
**************************************
So now you're asking: "just salads?", "vegetables only?"..... Of course not, here are some combinations you can try:
For appetizers or starters:
- Cellophane noodles, mushrooms, ginger and scallops
- Tiny crepes with apples, duck and wild mushrooms, nuts
- Truffled mashed potatoes with caviar and lobster
- Pancetta, avocado and shrimp with pineapple or mango salsa
- Mushroom, Gruyere, spinach with barley
- Shrimp, roasted peppers and quinoa
- Sushi and rice
- Couscous with apricot glazed lamb and red onions
- Grilled fillet, garlic mashed potatoes, leeks and red wine sauce
- Sausage, red cabbage, apple and fruit coulis
t:- Brownies with grilled bananas, whipped cream, nuts and melted caramel sauce
- Pound cake, caramelized peaches, vanilla custard, whipped cream and berry coulis
- Phyllo, rhubarb & strawberries, peppered creme anglaise topped with toasted almonds
Labels:
American Fare,
Appetizers,
Beef,
Fish and Seafood,
Fusions,
Lamb,
Lunch,
Salads,
Salsas,
Vegetarian
Friday, July 1, 2011
Absolutely Delicious..... and Healthy, too!

Lately, I've been having quite the experience with Spa and healthier cooking versions of dishes. No, it doesn't mean I've abandoned my sauces and other tasty tidbits, it just means that I've been working on "other" things to add to my repertoire...... If you're familiar with the Canyon Ranch Spa and other such culinary tendencies, then you know what I mean.
Converting beloved dishes, or trying to if you're into this, into lighter / healthier versions can be a challenge, especially if you've got dietary or nutritional requirements to incorporate into this at the same time, like Diabetes, Hypertension, Salt-free, Gluten-free, Vegetarian, Vegan, Raw Foodists, etc, etc, etc.... and while more than ever before there are options for all of these, sometimes it's very hard work to try and come up with satisfying and tasty results. If you've been reading the news of late it seems that more and more vegetarians are abandoning their lifestyle and once again joining the ranks of us "animal eaters", (or as a cooking school chum liked to call us "cruel cooking types"), due to the "cruelty free" production of meats, fish and seafood that are no
w available. So, wherever your tendencies lie, there is an answer for you!But getting back to semi-normal kind of cooking (organic & natural, healthier and lighter versions), here are a couple of recipes you might enjoy trying. I can state that they are high on flavor and deliver very satisfying results and easy to make. Intrigued?
Vegetable Lasagna with Parmesan or Garlic Sauce.- Thick, tasty sauce with plenty of vegetables. You won't miss the meat or anything else. Wonderful presentation too. Vegetables used are just a guide, change them for any you prefer, this is a very versatile recipe.
4 cups cooked vegetables (choose your favorite), I like Portobellos & Asparagus.....
4 1/2 Tbls Earth Balance Vegan Buttery Spread (or butter)
1 medium-large onion, chopped
Salt & Pepper as needed
1 pkg No-boil Whole Wheat Lasagna Noodles (or your regular ones, cooked & drained)
2 1/2 cups milk substitute (Rice Dream, Almond Milk or regular milk)
1 cup chicken broth (from organic chickens or your choice), low salt
6 garlic cloves, smashed with the side of a knife (or see Garlic Sauce)
4-5 Tbls flour (gluten-free, Rice, Whole Wheat or your choice of thickening agent), natural
1 1/4 cups grated Parmesan cheese, organic
1/2 pound Fontina (or provolone) cheese, grated (2 1/2 cups), organic
Have your vegetables ready, they should be cooked and seasoned and taste good on their own. Asparagus should be blanched,
Portobellos stir fried, etc. Reserve. I cook Portobellos with onions and garlic, S&P.....Heat 2 Tbs. butter over medium-high heat in a large skillet. Add onion; cook until soft and golden brown, about 5 minutes. Set aside. (This is optional if you like, I just add it to my veggies)
Mix 1 1/2 Tbls salt and 2 quarts very hot tap water in a lasagna pan. Add noodles and soak until soft and pliable 8- 10 minutes. Drain and stack loosely. Noodles tend to stick together as they dry, but pull apart easily, I prefer to leave some liquid instead.
Make Parmesan Sauce: Heat milk, broth and garlic until steaming hot. (slowly heat in saucepan over medium-low heat.) Fish out garlic; discard. (I leave it in...) Melt 3 Tbls butter over medium heat in saucepan; when foaming subsides, whisk in flour and continue to cook, whisking constantly, until well blended. Pour in milk mixture all at once and whisk vigorously until sauce is smooth and starts to thicken. Stir in 1/2 cup Parmesan, 1/4 tsp. salt and pepper to taste. Remove from heat; place plastic wrap directly on the sauce's surface.
If you're making Garlic Sauce instead: In saucepan, melt some butter & flour in the same amount, I use 4 tbls each and stir over med-high heat (watch it) for at least 2-3 min to cook the flour taste. Have 6-8 garlic cloves, through a garlic press, ready. Once the butter mix is ready, add the pressed garlic cloves and stir 1-2 min but don't allow to burn. Add the hot milk and whisk to prevent clumps. The mixture will thicken soon, keep whisking. Once it's thicker, add salt and pepper, taste and insure seasonings are good.
Adjust rack to upper-middle position and heat oven to 400-425 F. Put 1/4 cup of the sauce on bottom of baking dish. Place noodles to cover bottom, 2/3 cup sauce, 1/4 of the onions, 1/2 of one of the cooked vegetables (alternating layers), 1/2 cup Fontina and 2 Tbls Parmesan. Then do it again using the other vegetable. The final-top layer is remaining noodles, sauce and cheeses. You can see how many variations of this you can make, with or without meat, poultry, fish or seafood too. Change out the cheeses, etc.....
Seal with foil and bake until bubbly, about 35 minutes, you're just reheating mostly. Remove foil, then broil until cheese is golden brown, 5-7 minutes longer. Let stand 10-15 minutes before serving. (This is a must or it won't serve well). You can also do it all ahead, freeze and bake when you're ready, it will take longer in the oven of course and I would lower the oven temperature some if you do this...).
*********************************
Crispy Asian Vegetable Salad with Ginger-Carrot Dressing.- This can be a main dish or a side salad depending on the quantity of the ingredients. Amazing flavor!
1 1/2 cups carrots, peeled and sliced thin
1 cup red onion, sliced thin
1 1/2 cups brocoli florets
1 cup snow peas
1/2 cup zucchini, sliced thin

1 cup mushrooms, sliced thin
1 1/2 bok choy, chopped
1 cup jicama, peeled and sliced in thin sticks (batons)
1-2 Romaine Lettuce (or your choice), torn in bite size pieces
1-2 Tbls vegetable oil
In a large pan or wok over med-high heat, add the oil and swirl around. Add the carrot, red onion and broccoli and stir fry for about 30 seconds. Add snow peas, zucchini, mushrooms and stir fry for another 30 seconds. Add bok choy and fry until all vegetables are tender yet "al dente".
Add lettuce to a large salad bowl, top with the stir fried vegetables and top with the dressing. Toss quickly to preserve the lettuce. Serve at once.
GINGER-CARROT DRESSING.- I have this on hand and use in many ways.... you will too!
2 Tbls
carrot, grated2 Tbls ginger, grated
½ cup olive oil
Juice of 1 lime (or lemon
1-2 tbls Low Salt Soy Sauce
1-2 Tbls garlic, minced or pressed
½ tsp Dijon Mustard
1-3 Tbls Honey, to taste
Salt & pepper if needed and to taste
Mix all ingredients in a bowl except the olive oil, once the rest are mixed, begin adding the oil in a thin stream while whisking until well incorporated.
*******************************
Sweet Potato Cakes with Crispy Slaw.- Another healthy option you can try! Pretty great!
1 lb Sweet Potatoes, cleaned, pierced with a fork
1/2 cup red bell pepper, chopped small
1/2 cup yellow bell pepper, chopped small
1/3 cup red onion, chopped fine
2 Tbls cilantro, chopped fine
salt & pepper to taste

1 tsp coriander, ground
1 tsp cumin, ground
2-3 tsp sugar (Splenda or other substitute)
1 Tbls lime juice, fresh squeezed
1 cup breadcrumbs, dry
1 cup pecans, toasted & chopped fine
For the Slaw:
2 med Jicamas, peeled and cut into fine sticks (julienne)
1/3 cup red bell pepper, chopped fine
1/4 cup green onions, chopped fine
2-4 Tbls mango, peeled
1/2 Tbls lime juice
1/4 cup pineapple juice
salt & pepper if needed
2 tsp sugar (or substitute if needed)
In blender add mango, lime & pineapple juice, salt & sugar and process, make slaw.
In a bowl, add jicama, red bell pepper and green onions and toss. Pour the dressing that's in the blender over the vegetables and toss well. Reserve.
In a preheated 375F oven, cut the ends off the sweet potatoes and cover with foil. Bake about 45 min or until soft and then let them cool, peel and mash until they are smooth. Put these in a bowl and add the red bell pepper, onion, cilantro, seasonings and lime juice, and half the breadcrumbs and mix well. Cover the bowl and refrigerate overnight.
In another bowl put the remaining half of the breadcrumbs with the nuts and mix well. Using the sweet potato mix, form into 1/4 cup balls, roll in the breadcrumb & nut mix and then flatten into cakes. Heat a non-stick pan and add a very light layer of oil and heat. Fry cakes on one side until golden, then turn and cook the other side. Place some Jicama Salad on the plate and lay a couple of the sweet potato cakes on top of the slaw. You can drizzle some of the dressing around the plate.
**********************************
I'm sure you can convert some of your tried and true recipes to healthier versions
of themselves without loosing out on flavor yet making them better for you. I have to admit that I sneak the healthier versions into my husband's meals and for the most part he's liked all of them and didn't even notice the changes, so every now and then I continue to add to my recipes newer and better versions of dishes while contributing to our good health. Not hard to do at all and my guys are fierce carnivores! lol.... I hope you have access to Farmer's Markets where you are or organic growers and cooperatives in your neck of the woods so that you too can take advantage of better quality products. We've now got 4-5 organic fairs and markets here, during the Summer and Fall Seasons and if you can survive the outside temperatures (since they're all open air markets, except for Mario's, Yikes!) Mario Batalli now has one too, an organic come together which is becoming a reality for local Chefs.... might not be too bad, heh? Drawbacks? Expensive!!!! But you can see how hungry people are for something like this and while there are quite a few Whole Foods here (Ginormous and we call them Whole Paychecks.... this is still reserved for the "have" people since prices are NOT cheap at all... maybe someday...) Talk soon.....
Labels:
Discussions,
Dressings,
Italian Dishes,
Salads,
Side Dishes,
Vegetarian
Tuesday, June 21, 2011
Is it too hot to cook?..... You're still hungry, right?.....

Yes, it is really hot. Supposed to be 104F today with an expected high tomorrow of 109F (yes, crazy... I know), and you can't just hole up at home, become "mole people", crank up the AC and wait it for to pass.... no matter how much you want this to be.... Just think of others that are under hotter conditions than you, like my friends in Merida, Yucatan where their summer is hot and humid, Yikes!!!! Gets so hot and feels much hotter than here, although I miss them all the time, the weather is worth it just to be there, really.....
Anyhoo, let's get back to living in Hades.... the weather does not keep up from eating, it should and we should just stop eating, I know, but we don't and have no plans to either, so we scurry out past sunset, quickly grill and run back. Luckily we like our meat rare so it doesn't take too long either, but even if you don't cook outside, meals are still de rigeur (required) so whatever, we're cooking but maybe we can make cooler foods that will allow us to eat yummy foods while trying to keep the house cool (have to conserve energy, AC is expensive after all... and so nice), so I've got some great options for you..... And no, we won't be eating just salads and ice cream either, we want real food after all.....
This traditional dish is supposed to cook in a Dutch Oven, first searing the meat stove top and then finishing it up in the oven for h o u r s, but here is where having a bomb at home is worth its weight in gold. Instead of heating up the house and the oven for hours, you can use the good 'ol Pressure Cooker (no heat felt) and cook for about 30-40 min max.... pretty nifty I say.
Traditional Italian Pot Roast.- Wonderful flavor, hearty meal and sure to become a favorite.
1 boneless beef chuck-eye roast (3-4 lbs), tied

2 tbls vegetable oil
1 med onion, rough chop
2-3 carrots, rough chop
2-3 turnips, rough chop
1 rib of celery, chopped
1 pound cremini or white mushrooms, in large pieces
2 tbls tomato paste
2 cups tomatoes, medium dice or 1 (14 1/2 oz) can diced tomatoes
1/2 fresh tomato sauce or 1/2 cup canned tomato sauce
2 tsp sugar
1/2 cup water
1 cup red wine, Merlot or Beaujolais preferably
1 large head of garlic, remove the outer paper skin, then cut in half
1 sprig thyme, fresh
1 sprig rosemary, fresh
salt & pepper to taste
If using regular method, but you will begin the same for both techniques:
Put your oven rack in the middle position and heat the oven to 300F. (If using bomb, don't turn on the oven and you will sear the roast in the pressure cooker pot). Pat fry the roast with paper towels and salt and pepper liberally. Heat some oil in the Dutch oven (or pressure cooker) over med-high heat until just smoking and brown the roast on all sides, about 10 min. Transfer roast to large plate until you're ready to put it back in the pot.
Reduce heat to medium and cook the onion, celery, mushrooms, and tomato paste until the vegetables begin to soften, about 6 min. Add the diced tomatoes, tomato sauce, sugar, water, 1/2 cup of the wine (reserve the rest), garlic, and thyme. Return roast and the juices in the plate to pot and bring to simmer over medium-high heat. Place piece of foil over pot, cover with lid, and transfer pot to oven. (If using the pressure cooker, turn the heat to high and cover. Wait for the pot to come up to temperature and once the cooker begins to hiss, lower the heat to low and set the timer to 30 min.)
If using the oven: Cook until roast is just fork-tender, 2 1/2 to 3 1/2 hours, turning the roast after 1 hour. Uncover pot and let the roast rest in its juices for 30 min, skimming any surface fat after 20 min. Transfer the roast to a carving board and cover with foil. Remove and reserve the garlic head and skim any remaining fat from the pot (once you open the cooker you can skim off fat too). Add remaining 1/2 cup wine to pot, bring to boil over medium-high heat, and cook until sauce begins to thicken, about 12 min. Meanwhile, carefully squeeze garlic from the halves and mash it into paste, it should be very soft. Add the rosemary to the pot and simmer about 2-3 min. Remove and discard the rosemary and thyme sprigs, stir in the garlic mash and season with salt and pepper.
Remove the twine from the roast and cut the meat against the grain into 1/2" thick slices, or you can pull it apart into large rustic pieces. Transfer the meat to a serving platter and pour some of the sauce over the meat. Serve the rest of the sauce at the table.
**************************
Or maybe y
ou just want to grill or pan fry a steak (chicken or pork even) and just get it over with yet it still has to taste great.... How about a great "Chimichurri Sauce":Chimichurri Sauce.- We all know Argentina is known for its beef (amazing!!!), here's their traditional accompaniment to beef, which I use on almost everything:
1/4 cup hot water
2 teaspoons dried oregano
2 teaspoons kosher salt
1 1/3 cups loosely packed flat-leaf parsley leaves
2/3 cup loosely packed cilantro leaves
6 medium garlic cloves, minced or pressed through garlic press (about 2 tablespoons)
1/2 teaspoon red pepper flakes
1/4 cup red wine vinegar
1/2 cup extra-virgin olive oil
Combine hot water, oregano and salt in small bowl; let stand 5 minutes to soften oregano. Pulse parsley, cilantro, garlic, and red pepper flakes in food processor until coarsely chopped, about ten 1-second pulses. Add water mixture and vinegar and pulse briefly to combine. Transfer mixture to medium bowl and slowly whisk in oil until incorporated and mixture is emulsified. Cover with plastic wrap and let stand at room temperature at least 1 hour (if preparing sauce in advance, refrigerate and bring to room temperature before using).
*******************************
Zucchini and Leeks en Papillote.- A traditional French technique that can be applied to many different dishes, is very healthy and locks in flavors and prevents food from drying out:
2 zucchini, cut in long, thin strips
1 leek, cut off the tough tops and slice the white in fine juliennes

1/2 lb asparagus, trimmed into 2 parts
4 sprigs tarragon, fresh
4 garlic cloves, unpeeled
salt & pepper to taste
1 egg, beaten optional
water (optional)
cornstarch (make paste optional)
Preheat the oven to 400F. You can use a potato peeler to slice the zucchini lengthwise into thin strips.
Cut 4 sheets of parchment paper, 12 x 15 inches in size. Fold it in half. Draw half a heart shape when folded so it will be a whole heart unfolded. Cut along the inside of the line and open out.
Divide the vegetables between each heart. Position the filling on the right side of the fold line and top with tarragon and the unpeeled garlic clove. Season to taste.
Brush the edges of the paper with the beaten egg and fold over. You don't have to use the egg and can fold it without using the egg. I found this site on the web which I thought was a really good explanations of how to accomplish this technique. Cut and paste onto your browser http://www.sundaysupper.com/parch.htm gives directions and shows photos of the no egg technique, it will make you an expert at "Papillote".
Pleat the edges so it is sealed. Put it on a cookie sheet and bake for 10 min. It will puff up so make sure to move the oven racks and leave room. Serve immediately. You can let each person open their own packet on their own with scissors, but be sure and tell them that heat will escape and could burn, so open with care and enjoy the lovely aromas this technique gives.
NOTE: Once you've mastered the making of the packets this way, you can use it for fish and vegetables giving you a clean and very healthy alternative to cook.
*******************************
In keeping with "cool" foods, here are two desserts which can be made ahead and will deliver flavor and comfort in a refreshing dish. First of all I want to give you a "foolproof" pastry crust you can use for all types of pies, you'll love it:
Foolproof Pie Crust.-This pie crust can be pressed into the pie plate and refrigerated for up to 2 days or double wrap in plastic and freeze for 1 month. Once baked, cool, the shell can be wrapped tightly in plastic and stored at room temperature for up to 1 day.
1 1/4 cups all-purpose flour
1/4 tsp table salt
8 tblsp butter (1 stick), softened but still cool (I've used shortening too)
2 oz cream cheese, softened but still cool
Lightly spray 9" glass pie plate with cooking spray. Whisk flour, sugar, and salt together in a bowl. With an electric mixer at med high speed, beat the butter and cream cheese, scrape down the beaters and sides of bowl, and beat until completely mixed, about 2 min. Add the flour mixture and combine on medlow until it looks like coarse cornmeal, about 20 seconds. Scrape down sides of bowl. The mixer speed now to med high and beat it until dough begins to forms large clumps, about 30 seconds. Set aside 3 tblsp of the dough.
Turn the remaining dough onto a lightly floured surface, gather it into a ball and flatten into a 6" disk. Transfer this disk to greased pie plate.
Press the dough evenly over bottom of pie plate toward sides, using heel of your hand or the bottom of a smooth cup (you can also roll out the pastry with a rolling pin as usual and then place it on the pie plate). Make sure that the dough is evenly distributed yet should be thin. Continue to work the dough over the bottom of the pie plate and up the sides until even. On floured surface, roll the reserved dough into a 12" rope. Cut into three pieces, then roll each piece into a 8" rope to form a fluted edge. Wrap it in plastic and refrigerate at least 1 hour.
With the oven rack in the middle of the oven turn oven to 325 F. Lightly prick the bottom of the crust with a fork. Bake until golden brown, 30 to 40 min. Cool on wire rack. (If large bubbles form, wait until the crust is fully baked, then gently press on bubbles with a kitchen towel or back of spoon. The bubbles will settle as crust cools.)
***********************************
Amazing Lemon Pie.-This simple recipe forms a custard type filling. You need 6 tablespoons of lemon juice for this recipe so have an extra lemons on hand in case the 3 sliced lemons do not yield enough juice.
1 double-crust pie dou
gh (see above and make 2 batches)3 large lemons, sliced thin and seeded (I use Persian Lemons)
1 cups sugar
1/8 tsp salt
1 tbls cornstarch
4 large eggs
1 tbls heavy cream
Adjust your oven rack to lowest position and heat the oven to 425 F. Line a 9" pie plate with 1 dough round and refrigerate for 30 min.
Squeeze the lemon slices into fine strainer set over a bowl; reserve the juice (you should have 6 tablespoons). Put the drained slices and 2 cups water to boil in a saucepan, then reduce the heat to med low and simmer until slices are soft, about 5 min. Drain the slices well and discard the liquid. Combine the softened lemon slices, sugar, salt, and 1/4 cup reserved lemon juice in a bowl; stir until the sugar dissolves.
Whisk the cornstarch and remaining lemon juice in a large bowl. Whisk the eggs into the cornstarch mixture, slowly stir in the lemon slice mixture until well combined. Pour into the chilled pie shell. Brush the edges of the dough with 1 tsp cream and top with the remaining dough round. Seal, crimp edges, and brush the top of dough with remaining cream. Using a paring knife, cut 4 vents in the top of the dough.
Bake until light golden, about 20 min, then lower the oven temperature to 375 F and continue to bake until golden brown, 20 to 25 min. Cool on wire rack for at least 1 hour. Serve. Pie can be wrapped in plastic and refrigerated for 2 days after baking.
NOTE: Found some tips on pies and it said that using a knife to evenly cut the lemons into paper-thin slices was a difficult and time-consuming task. You get better results with a mandoline (or V-slicer), which produced perfectly thin. But, if you didn't have a mandoline, putting the lemons into the freezer for about 30 minutes firms them up for better hand-slicing, which is best accomplished with a serrated knife. But same goes when you want to thin slice other things too, like fish or meat.....
********************************
Perfect Strawberry Pie.-Here is a strawberry pie that truly delivers, but you have to make sure you have 2 cups of the berry mixture and you need to measure! The frozen fruit helps develop flavor and texture.
2 lbs frozen strawberries

2 tbls lemon juice
2 tbls water
1 tbls unflavored gelatin
1 pinch salt
1 lb fresh strawberries, cleaned and sliced thin
1 9" pie shell, baked and cooled
4 oz cream cheese, softened
3 tbls sugar
1/2 tsp vanilla extract
1 cup heavy cream
Cook the frozen strawberries in a large saucepan over med low heat until berries begin to release juice, about 3 min. Increase the heat to med high and cook, stirring, until thick and jam like, about 25 min (should be 2 cups).
Put lemon juice, water, and gelatin in small bowl. Let stand until gelatin is softened and mixture has thickened, about 5 min. Stir gelatin mixture, sugar, and salt into cooked fruit mixture and return to simmer, about 2 min. Transfer to a bowl and cool to room temperature, about 30 min.
Fold the fresh berries into the filling. Spread evenly in the pie shell and refrigerate until set, about 4 hours or even overnight.
With an electric mixer on med speed, beat cream cheese, sugar, and vanilla until smooth, about 30 seconds. With mixer running, add cream and whip until stiff peaks form, about 2 min. Serve pie with whipped cream topping.
NOTE: Be sure to measure the reduced strawberry mixture: You need exactly 2 cups. Put the strawberry mixture into a measuring cup. If its more than 2 cups, return it to the pan and cook it down. It may seem OCD to to measure, but the pie won't set or slice properly if you have more than 2 cups of the strawberry mixture, so take the extra couple of minutes to insure a perfect pie.
*******************************

So far this is as far as I got this time, took too long and put other things on hold so now's the time to get going on the rest. The house is very smoky with the aroma of roasting Poblano's and the heat isn't letting me open windows for now so whatever.... at least I like the smell, right? But I've been whipping up some batches of some "fun food" from way back: jello & pudding shots in some creative flavors since these popular "kid friendly" foods grew up.... you'll see, I'll send you some ideas as soon as I finish this up later. Until then, relax and enjoy!......
Labels:
Beef,
Desserts,
Dressings,
Fish and Seafood,
From France,
Italian Dishes,
Salsas,
Side Dishes,
Vegan,
Vegetarian
Sunday, May 22, 2011
Fresh Fish.... the smell and taste of the Ocean in your mouth.....

I love fish and seafood or should I say I love FRESH fish and seafood. It's said this is the best source of protein and the one we assimilate the best. Full of the things our bodies need to keep it healthy and lean, amazing delicate taste and texture..... BUT in these times and unless you live right by the water (ocean or river) your access is limited by the quality and price. Yikes!
This happens to us here in the middle of the desert and many a time I've found myself debating about wild caught or farm raised, fresh or flash frozen, a good deal or price so high it's outrageous.... whenever the need arose to have some fish or seafood. Of course, in one sense we're lucky to have all the casinos in town with so much purchasing power that allow food vendors to make daily runs to Sin City which gives us variety, but then on the other hand they have to fly them in, treat them with tremendous care which drives up the price so most people on a budget simply can't make them part of their diet anymore. Plus there are lots of people that simply don't like fish at all.
Sure, we have some of the best celebrity chefs in the world with restaurants here
Got some pretty decent Red Snapper Fillets on sale at my local Smith's which is part of the Kroger chain, we've been partial to them for many years especially due to their penchant for excellent meat and steaks, great prices and their specials. This time it was fish and shellfish week so we get to indulge a little bit which is what brought me to this post. So I've got these two monster fillets of Red Snapper waiting to be turned into something amazing and I'm looking everywhere for inspiration..... here are some:
Greek Style Fish.- You can use almost any fish with this recipe, it's an old standby and always amazing, easy and quick.

1-2 lb fish steaks
Kosher salt
1 cup flour for dredging
1 Tblsp garlic powder (not garlic salt)
1/4 cup olive oil
4 Tblsp Asian fish sauce, or 2 Tblsp Worcestershire sauce
2 Tblsp olive oil
2 Tblsp honey
2 Tblsp ouzo or other anise-flavored liqueur (I'm using Tequila)
1 Tblsp chopped fresh oregano
Freshly ground black pepper
Make sure the fish looses the cold of the fridge for about 5-10 minutes. Sprinkle kosher salt on them. Mix the 2 tablespoons olive oil, the honey and the fish sauce together by whisking vigorously for a minute or so. Mix the garlic powder in with the flour.
Heat a large frying pan over high heat for a minute or two. Add most of the 1/4 cup of oil. Start with a little more than half. Turn the heat down to medium-high and let this heat up for 2 minutes. Dust the fish with the seasoned flour, shake off the excess and sear in the oil. Let the fish sear to a golden brown. You might have to cook the fish in batches if your pan is too small. Set aside the finished fish as you do the rest. Add more of the reserved olive oil if you need it.
Remove all the fish to a paper towel and let drain. Pour in the ouzo and scrape off any browned bits with a wooden spoon. Add the honey-fish sauce-olive oil mixture and mix everything well. Let this cook down until the whole surface of the pan is a mass of bubbles. Turn off the heat. Add the fish back into the pan and coat with the sauce. Serve over rice, garnished with the oregano and the black pepper.
************************************
Sichuan Sweet and Sour Crispy Fish.- Doesn't that just sound amazing! This is such a great recipe you have to try it so you too can see.....
2 whole (but scaled and gutted) rockfish or other pan-sized fish
3 green onions, chopped

1 inch piece ginger, peeled and finely chopped
1 Tblsp Chinese cooking wine (or Japanese Mirin)
1 Tblsp soy sauce
1 tsp freshly ground black pepper
3 inch piece of ginger, peeled and cut in julienne (very thin strips)
1/2 medium onion, cut in very fine half moon slices
3 cloves garlic, sliced very fine
1/2 habanero chile, or 1-2 Thai chiles or 1 serrano, very finely sliced
5 Tblsp water
5 Tbsp tomato sauce or catsup
3 Tbsp sugar
1 Tbsp Chinese cooking wine (or Japanese Mirin)
1 Tbsp soy sauce
1 1/2 tsp corn starch
1 Tblsp finely chopped cilantro
1 Tblsp finely chopped green onions or chives
4 cups peanut or vegetable oil
2 cups flour for dredging
Prepare the fish. Cut off the fins of each fish with kitchen shears or scissors. Remove the gills of the fish if they are still attached by cutting them out with the kitchen shears. Make three vertical slices along each side of the fish evenly spaced along its length. If you have a long fish, make four slices. Rinse the fish under cold water and pat dry.
Marinate. Mix the 3 green onions, the finely chopped ginger, the tablespoon of Chinese cooking wine, the tablespoon of soy sauce and the black pepper together, then pour the mixture into a glass or plastic container, or Ziploc bag, with the fish and make sure the marinade surrounds the fish. Let this sit in the fridge for 30 minutes.
Prepare the vegetables. Have the julienned ginger, the 1/2 onion, the garlic cloves, all ready. Pour the oil into a wok and turn the heat on to medium. If you do not have a wok, use the largest, deepest skillet you have. A wok helps here, since its shape prevents the tail fin from burning. Take care in a pan and make sure your fish fits.
Make the sauce. Mix the tomato sauce, sugar, soy sauce, Chinese cooking wine, water and corn starch and stir vigorously to combine. Set it aside. Take the fish out of the fridge and check the oil temperature. Should be about 300-325 degrees. If you don't have a thermometer, the oil is ready when a drop of water is dropped into the oil fizzles immediately.
Fry the fish. Remove the fish from the marinade and dredge in flour. Shake off excess, and when the oil is hot, slip the fish into the oil. Do one fish at time. Turn the oven on to "warm." Fry the fish for at least 5 minutes per side. You want it to be crispy, golden brown. With 300-degree oil, a 1-pound fish is fried for 8 minutes on the first side, 5 minutes on the other side. Larger fish will need more time so keep an eye on it. When the first fish is done, remove it to a plate and put the plate in the warm oven. Fry the second fish the same way as the first, etc.
Finishing up. When the fish are done, take out all but about 1/4 cup of the oil, reserve the rest (you can filter through a coffee filter, cool and save in a jar for another fish fry). Toss in the ginger, the onion, the chiles and the garlic and stir-fry over high heat for 2 minutes. Add the sweet-and-sour sauce and stir well to combine. Bring this to a rapid boil and stir well. Cook for 2 minutes. To serve, place the fish on a plate, sauce on top of it and garnish with the finely chopped chives and cilantro. This dish goes best with simple steamed white rice.
************************************
Parmesan Baked Fish.- Easy, quick and wonderful, what more could you ask for?
1/4 cup milk

2 tsp salt
2 lb fish fillets
1/2 cup fine dry bread crumbs (I use old bread, all kinds of bread, in a blender)
1/2 tsp paprika
1/4 cup grated Parmesan cheese
melted butter
Preheat oven to 375 F. Grease a rectangular baking dish. Blend together the milk and salt in a shallow bowl. Combine bread crumbs, paprika, and Parmesan cheese in another bowl. Dip fish fillets into milk mixture then into crumb mixture. Arrange in the prepared baking dish. Drizzle melted butter over fillets. Bake for 25 minutes, depending on thickness of fillets. Fish should flake easily with a fork when done.
*****************************************
Easiest and Crispiest Fish Fillets.- A basic recipe that yields great fish. Economical, practical and done in no time flat! I also like corn flakes for crispy pork chops and chicken.
1 to 1 1/4 pounds fish fillets
2 tblsp butter, melted
2 tblsp lemon juice

1/2 tsp salt
1/4 tsp pepper
1/4 tsp dried dill weed, optional (dill is amazing with fish & potatoes)
2 cups crushed corn flakes (in the blender but just pulsed so it's not all fine)
Grease a 13x9 inch baking dish. If fish fillets are large, cut into serving-size portions. Combine butter and lemon juice; set aside. Mix salt, pepper, and dill weed. Dip each piece of fish in butter and lemon mixture. Sprinkle salt and dill mixture over each side of fish. Coat with the corn flake crumbs. Place fish fillets in prepared pan and bake in a 350 F oven until fish flakes easily with a fork, 20 minutes, depending on thickness of the fish fillets.
*************************************
Salmon with Champagne Sauce.- So simple yet so elegant, very fast and impressive!
4 salmon filets

1 cup flour for dredging
1/3 cup unsalted butter
1 cup Champagne or other dry sparkling wine, like Prosecco
1 cup heavy cream
Salt and pepper to taste
Sprigs of parsley
Add salt and pepper to the flour. Flour the filets and shake off the excess. Melt the butter in a broad skillet over medium heat and cook the filets for 4 minutes, turning them after 2 minutes. Sprinkle half the champagne over them and continue cooking until it is reduced by half. When the filets are done, remove them to a heated serving dish and keep them warm.
Raise the heat to medium-high. Add the rest of the champagne to the pan and bring to a boil. Add the cream to the pan, season to taste, and continue to cook until the sauce becomes creamy. Taste to adjust seasonings. Spoon the sauce over the fish, garnish with parsley, and serve at once.
********************************
As always, for more recipes about fish or sauces you can use to complement a dish, please s
earch through the blog, ok? Lots of tips, preparations and ideas for one thing can be adapted to suit other needs and you might just find something that will give you an amazing dish.Don't forget that if you need help with a recipe or want to serve something special and you need more info, drop me a line and I'll be glad to help any way I can. Hoping everyone's weekend has been restful and lovely, we'll talk soon....
Labels:
American Fare,
Fish and Seafood,
From France,
Greek,
Italian Dishes,
Vegetarian
Subscribe to:
Posts (Atom)