Showing posts with label Pork. Show all posts

Tuesday, March 29, 2011

Some Lovely Little Things..... and Easy Too!


We're in a Oriental mood, something we get often and it really doesn't matter which type. Could be Chinese, Thai, Japanese or whatever as long as those particular flavors are there and we satiate our tastes. For one of our practicals, Rene made pot stickers and with those in mind we started running down a list of old favorites and came up with some that I thought you'd like, were easy to make and deliver not just the "punch" you need but can be made for company or any weekend.

Tasty little tidbits, fresh flavors, wonderful spices and flavorings..... always welcome and everyone seems to enjoy them equally, even the kids will like these! Perfect for game snacks, a lazy weekend at home or an impromptu cocktail party.... you'll see how satisfying they can be, for everyone.

Feel free to substitute and use your favorite ingredients, you'll see how flexible and versatile these recipes are. If you like more heat, go ahead and add it, same goes for sweetness or salt, make these customized to your family's tastes and enjoy!

So let's get started, ok?

Pot Stickers.- Wonderful flavor, delicate and pretty amazing!

1/2 pound ground pork
1/4 cup finely chopped scallions
2 tablespoons finely chopped red bell pepper
2 tablespoons finely chopped fresh ginger
1 egg, lightly beaten
2 teaspoons ketchup
1 teaspoon yellow mustard
2 teaspoons Worcestershire sauce
1 teaspoon light brown sugar
1 1/2 teaspoons kosher salt
1/2 teaspoon freshly ground black pepper
1/4 teaspoon cayenne pepper
35 to 40 small wonton wrappers
Water, for sealing wontons
3 to 4 tablespoons vegetable oil, for frying
1 1/3 cups chicken stock

Preheat oven to 200 degrees. Combine the first 11 ingredients in a medium-size mixing bowl. Set aside. To form the dumplings, remove 1 wonton wrapper from the package, covering the others with a damp cloth. Brush 2 of the edges of the wrapper lightly with water. Place 1/2 rounded teaspoon of the pork mixture in the center of the wrapper. Fold over, seal edges, and shape as desired. Set on a sheet-pan and cover with a damp cloth. Repeat procedure until all of the filling is gone.

Heat a 12-inch saute pan over medium heat. Brush with vegetable oil once hot. Add 8 to 10 potstickers at a time to the pan and cook for 2 minutes, without touching. Once the 2 minutes are up, gently add 1/3 cup chicken stock to the pan, turn the heat down to low, cover, and cook for another 2 minutes. Remove wontons to a heatproof platter and place in the warm oven. Clean the pan in between batches by pouring in water and allowing the pan to deglaze. Repeat until all the wontons are cooked. Serve immediately. You can serve with your favorite sauce on the side.
*************************

Shu Mai.- A very popular appetizer that you'll love!

Makes about 40 dumplings, serving 6 to 8 as an appetizer. The dumplings may be frozen for up to 3 months; cook them straight from the freezer for about an extra 5 minutes.

2 tablespoons soy sauce
1/2 teaspoon unflavored powdered gelatin
1 pound boneless country-style pork ribs, cut into 1-inch pieces
(or use lean, ground pork)
1/2 pound shrimp, peeled, tails removed and halved lengthwise
1/4 cup water chestnuts, chopped
4 dried shiitake mushrooms, in hot water 30 min, squeezed dry, cut small dice
2 tablespoons cornstarch
2 tablespoons minced fresh cilantro leaves
1 tablespoon toasted sesame oil
1 tablespoon Chinese rice cooking wine (Shaoxing) or dry sherry
1 tablespoon rice vinegar
2 teaspoons sugar
2 teaspoons grated ginger
1/2 teaspoon salt
1/2 teaspoon ground black pepper
1 (1 pound) package 5 1/2 inch square egg roll wrappers
1/4 cup carrot, finely grated (optional)

Combine soy sauce and gelatin in small bowl. Set aside to allow gelatin to bloom, about 5 minutes. Meanwhile, place half of pork in food processor and pulse until coarsely ground into approximate 1/8-inch pieces, about ten 1-second pulses; transfer to large bowl. Add shrimp and remaining pork to food processor and pulse until coarsely chopped into approximate ¼-inch pieces, about five 1-second pulses. Transfer to bowl with more finely ground pork. Stir in soy sauce mixture, water chestnuts, mushrooms, cornstarch, cilantro, sesame oil, wine, vinegar, sugar, ginger, salt, and pepper. Divide egg roll wrappers into 3 stacks (6 to 7 per stack). Using 3-inch biscuit cutter, cut two 3-inch rounds from each stack of egg roll wrappers (you should have 40 to 42 rounds). Cover rounds with moist paper towels to prevent drying. Working with 6 rounds at a time, brush edges of each round lightly with water. Place heaping tablespoon of filling into center of each round. Following illustrations below, form dumplings, crimping wrapper around sides of filling and leaving top exposed. Transfer to parchment-lined baking sheet, cover with damp kitchen towel, and repeat with remaining wrappers and filling. Top center of each dumpling with pinch of grated carrot, if using. Cut piece of parchment slightly smaller than diameter of steamer basket and place in basket. Poke about 20 small holes in parchment and lightly coat with nonstick cooking spray. Place batches of dumplings on parchment liner, making sure they are not touching. Set steamer over simmering water and cook, covered, until no longer pink, 8 to 10 minutes. Serve immediately with chili oil.
********************************

Vegetarian Steamed Dumplings.- Another well known and loved appetizer.

1/2 pound firm tofu
1/2 cup coarsely grated carrots
1/2 cup shredded Napa cabbage
2 tablespoons finely chopped red pepper
2 tablespoons finely chopped scallions
2 teaspoons finely minced fresh
1 tablespoon chopped cilantro leaves
1 tablespoon soy sauce
1 tablespoon hoisin sauce
2 teaspoons sesame oil
1 egg, lightly beaten
1 teaspoon kosher salt
1/4 teaspoon freshly ground black pepper
35 to 40 small wonton wrappers
Non-stick vegetable spray, for the steamer

Preheat the oven to 200 degrees. Cut the tofu in half horizontally and lay between layers of paper towels. Place on a plate, top with another plate, and place a weight on top (a 14-ounce can of vegetables works well). Let stand 20 minutes. After 20 minutes, cut the tofu into 1/4-inch cubes and place in a large mixing bowl. Add the carrots, cabbage, red pepper, scallions, ginger, cilantro, soy sauce, hoisin, sesame oil, egg, salt, and pepper. Lightly stir to combine. To form the dumplings, remove 1 wonton wrapper from the package, covering the others with a damp cloth. Brush the edges of the wrapper lightly with water. Place 1/2 rounded teaspoon of the tofu mixture in the center of the wrapper. Shape as desired. Set on a sheet pan and cover with a damp cloth. Repeat procedure until all of the filling is gone. Using a steaming apparatus of your choice, bring 1/4 to 1/2-inch of water to a simmer over medium heat. Spray the steamer's surface lightly with the non-stick vegetable spray to prevent sticking. Place as many dumplings as will fit into a steamer, without touching each other. Cover and steam for 10 to 12 minutes over medium heat. Remove the dumplings from the steamer to a heatproof platter and place in oven to keep warm. Repeat until all dumplings are cooked.
******************************

Thai Pork Lettuce Wraps.- These can be made with almost any protein, like the other one's too, and make an excellent lunch, brunch or dinner offering. Fresh and healthy!

Serve 6 as an appetizer or 4 as a main course.
1 pork tenderloin (about 1 lb), trimmed, cut into 1-inch chunks
(or use ground pork, chicken, small shrimp, stir fry vegetables, etc.)
2 1/2 tablespoons fish sauce
1 tablespoon white rice
1/4 cup low-sodium chicken broth
2 medium shallots , peeled and sliced into thin rings (about 1/2 cup)
3 tablespoons juice from 2 limes
2 teaspoons sugar
1/4 teaspoon red pepper flakes
3 tablespoons roughly chopped fresh mint leaves
3 tablespoons roughly chopped fresh cilantro leaves
1 head Bibb lettuce, washed and dried, leaves separated and left whole

Place pork chunks on large plate in single layer. Freeze meat until firm and starting to harden around edges but still pliable, 15 to 20 minutes. Place half of meat in food processor and pulse until coarsely chopped, 5 to six 1-second pulses. Transfer ground meat to medium bowl and repeat with remaining chunks. Stir 1 tablespoon fish sauce into ground meat and marinate, refrigerated, 15 minutes.

Heat rice in small skillet over medium-high heat; cook, stirring constantly, until deep golden brown, about 5 minutes. Transfer to small bowl and cool 5 minutes. Grind rice with spice grinder, mini food processor, or mortar and pestle until it resembles fine meal, 10 to 30 seconds (you should have about 1 tablespoon rice powder).

Bring broth to simmer in 12-inch nonstick skillet over medium-high heat. Add pork and cook, stirring frequently, until about half of pork is no longer pink, about 2 minutes. Sprinkle 1 teaspoon rice powder over pork; continue to cook, stirring constantly, until remaining pork is no longer pink, 1 to 1½ minutes longer. Transfer pork to large bowl; let cool 10 minutes.

Add remaining 1 1/2 tablespoons fish sauce, remaining 2 teaspoons rice powder, shallots, lime juice, sugar, red pepper flakes, mint, and cilantro to pork; toss to combine. Serve with lettuce leaves using each leaf instead of tortillas.
NOTE: These are super flexible and an type of protein works great, even tofu and veggie items!
**********************************

After reading these I'm sure you can see about feeling free to substitute ingredients, right? You can use your refrigerator leftovers and turn them into something pretty great, eliminating waste and saving money at the same time. Depending on your dietary needs, you can allow for these as well. Have friends, partners or kids join in the assembly and make it a group project. You'll get done in no time at all, everyone will enjoy it and sharing the results will be appreciated by all!

So go ahead and make these your family's choice for an Asian Night and savor something unusual that can be fun too! Hope you enjoy them....

Saturday, March 5, 2011

Salumeria - Pork Parts and other tasty bits.........


I have always been interested in cured meats, that came out of left field didn't it? lol.... but coming from a Basque family on my father's side (and you know how "different" this makes people... I'm being nice now...) means a strong independent streak when it comes to things and food in particular, and my Dad loved his cured meats and would make all kinds of tasty bits every now and then and if I was in the area, was known to be his "accomplice".... I learned about meat, smokers, fishing, hunting, camping and related items and it gives me a good appreciation when artisan producers present quality products.

Buying meats this way though isn't very satisfying and I've always maintained that if you're serious about a particular kind of food you'll ultimately figure out a way to make your own and make it better plus it will be custom designed to suit your taste, your nutritional needs and special health concerns. This is how it is. Sure, once again we come to the inevitable question I get from everyone: "But it's so much work and takes such a long time"..... Stop it! So it takes time? Anything worth anything is worth working on and if you're really interested, you find the time. Period. So no whining, ok? It's all work and dedication or just go to the market and buy it.

Moving so much and having gotten rid of most of my equipment means it's more challenging yet it doesn't mean you need to get specialized equipment or you can't get it done, hey I've smoked fish on top of the stove and it was easy and wonderful. Just adapt and be flexible but most of all, be creative and stick to it. You'll get there, there is no doubt, I've proven this time and time again. It's worth it too.

Now your taste could range from making your own bacon to Salami, Pancetta or even Prosciutto. It's all good and possible. There are more and more shops opening up offering Artisanal products made with care and wholesome ingredients so it tells you that there are many of us out there that care about this. I wish I could find someone who could mentor me and teach me the old ways to produce these wonderful meats but for the time being, I am teaching myself with my Dad's way plus lots of books from the library and the good old Internet. So far, good stuff is the result and it's making us happy, happy but I know perfection is still ahead.

First of all I'll say that I've read up many of Michael Ruhlman's posts on the subject of all things "pig" and his recipe for making your own bacon is amazing! I find pork belly at the local Korean Market at a reasonable price or this project wouldn't get off the ground, and the International Marketplace is responsible for the fresh herbs and spices that flavor the meats mentioned. Don't forget that I am on an even stricter budget due to the spikes in food prices of late but we are still making and enjoying amazing foods from all over the world on a regular basis due to our flexibility and creativity. Now the circle is complete and Rene is MY accomplice and we are having a great time! He is also VERY interested in all things cured meat.

Between Ruhlman's books (hope you don't mind my bastardizing your procedures Michael and take this as a tribute instead..) as well as many others, plus SO much information on the Web, this is what we've come up with....

Making Your Own Bacon at Home.- If you appreciate fantastic bacon, you will be happy! My favorite is Wild Boar Bacon but haven't been able to find fresh Boar meat... you can buy the bacon online....

You'll need:
Fresh pork belly, I followed the 5 lbs weight for this (if you want more or less, adjust)
1/4 cup Kosher Salt, coarse type (Ruhlman says to weigh it- 2 oz)
2 tsp Pink Curing Salt
4 tbl black pepper, coarsely ground or cracked
4-5 Bay Leaves, crumbled
1 tsp Nutmeg, fresh ground from a nut
6-12 Thyme Sprigs
3 tbl Juniper Berries, crushed (optional)
7-10 Garlic cloves, peeled, crushed or through a garlic press
1/2 cup Brown Sugar -or- Honey -or- Maple Sugar -or- your choice
Large Zip Lock Bags (2 Gal size) or aluminum foil or plastic wrap
NOTE: I've added red pepper flakes, regular sugar, cumin, mustard, etc. to vary the flavor and this is completely optional and up to you. This is just to get a different flavor.

In a large bowl put all the ingredients (after the pork belly) in an mix them all well. Put the pork belly in the zip lock bag (I've also used lots of plastic wrap when I've run out of zip lock bags), and rub the spice mix all over it, rubbing it well like you would a meat rub. Get as much of the air out of the bag and seal it up well. You could put this whole thing into another zip lock or wrap it up with plastic wrap so it's well sealed. Make room in your fridge and put it in there for at least a week. Every couple days or so, get it out and turn it while you "re-rub" the spices again.

After the week in the refrigerator, remove it from the fridge, take it out and rinse off the spices under cold water and dry it off with paper towels.

Turn the oven to 200 degrees F (or the lowest setting you have) and use a cookie/baking sheet to put the meat on. Let the meat sit in the oven for at least 90 minutes or if you use an instant read thermometer, it should read close to 150 degrees. Once it's there, take it out of the oven and allow to cool. If you're not using it right away, be sure to refrigerate it, otherwise, you're ready to begin using it.

Here are a couple of tips: I am not salty so too much salt makes it unpleasant for me. So go easy on the salt.

If you want smoked bacon then go ahead and follow directions for this. Just make sure you've cured it well. This can also be hung to dry like Salami if you like.
***********************************

Home-Made Salami.- Easy to prepare and satisfying to eat, here's a beginner's guide to making your own Salami.

3 lbs ground meat (pork / beef or ?)
1 tsp garlic powder (not garlic salt)
1 tsp onion salt
1 tsp red pepper flakes, very finely crushed
3 tbl Liquid Smoke
3 tbl Curing Salt
2 1/4 cups water

In a large bowl, mix all the ingredients except the meat, until they are really, really well combined. Add the meat and mix together with the spices, again, really, really well. You don't want to have a piece with more salt or pepper than another piece, so mix, blend, fold until it's evenly mixed and you can see even color all over.

Once it's well mixed, shape the meat into "logs", these can be small or good sized, it's up to you but half pound logs are fine or maybe three pound logs if you use it a little bit more. Cover tightly with aluminum foil, insuring it's well sealed and put it in your fridge for about 2 days.

Preheat oven to 325 degrees F and then place a wire rack in a deep baking pan. Pierce the logs with a fork or small knife all over before placing in the oven and then sit the logs in the wire rack and place in the oven to bake for about 1 hour and 45 minutes. Check the logs and if they seem too wet, unroll the foil and bake the logs for an additional 15 minute increments, but lowering the heat this time to the lowest setting your oven has, about 200 degrees. This is to dry out the logs.

The Salami is now ready yet don't despair if it's not exactly the same as the store bought ones. Don't forget that commercially prepared cured meats contain colorants and preservatives, plus chemicals and additives that affect the colors.
*********************************

I can promise to do a lot more research into this matter and let you know what I find. I'm experimenting on Duck & Lamb Prosciutto, Chorizo Espanol and other wonders, we'll see what we come up with, but as lots of other things, the trip is exciting while the arrival is comforting. I'll report back.

Sending everyone my best wishes for a wonderful weekend and I've already started working on future posts full of interesting new concepts so I hope you will keep checking back to see what I can come up with. Take care and talk soon.............

Monday, February 21, 2011

Classic Mexican Cuisine for a cold and rainy day.... Just perfect!


I first began making "Birria Estilo Jalisco" in Puerto Vallarta. We had just moved there, gypsies that we are, and thought it would be easy to find since now we were in the state of Jalisco. Now, Birria is usually made out of goat meat but it's a stronger tasting meat and doesn't work for most people so I wasn't surprised to find it made out of beef or pork yet the only people offering this classic Mexican dish were carts on the street and while not bad (you think I didn't try this?) it didn't hit all the flavor notes I was looking for and the more I looked around and spoke to people, it became increasingly clear that "modern times" had hit Vallarta too.

Vallarta, as it's known to the locals, is a sleepy little beach town that was discovered way back when Elizabeth Taylor decided to have an affair with Richard Burton (yes, all that...) and this "scandal" brought the world's media in (along with the filming of the "Night of the Iguana"). The director, John Huston, had a particular preference for Vallarta since this is where he lived. While during those years it didn't have the infrastructure it has today, no fancy hotels, discos, restaurants or anything else for that matter, the natural beauty of the beaches, the jungle vegetation and tropical climate made converts of everyone and so the invasion began and Vallarta was "discovered".

The state of Jalisco is among the prime examples of the better known Mexican Cuisine since it's responsible for Tequila, Birria, Pescado Sarandeado, dishes using Maguey and it's derivatives, Pozole and many others. The state is among the richest and most progressive and having Guadalajara as its capital, offers the best medical care and Universities too. The climate is compared to an eternal Spring, local products are first rate and its women are considered among the most beautiful. Charros are from Jalisco and many traditions began here as well. So, it's a nice place.

Getting back to the "Birria", I found if I was going to get what I was going after I would have to make it myself and I set upon finding the real Jalisco style Birria recipe. I spoke to mothers and grandmothers who were the only ones cooking anymore (women here are out of the kitchen and in the workplace, younger generations no longer cook and fast food or take out are very popular, just like other places on the planet which means traditional cooking methods and foods will suffer) and pretty soon I had a good idea what I was after. This is my usual "modus operandi" when it comes to obtaining "true" recipes, I investigate, talk to the older people and reach a consensus on what the "real" version of dishes is all about; I insure I've got the "real" techniques and ingredients and once I produce an acceptable version do I consider "tweeking" to suit our individual preferences. It's worked in the past and I've been very successful doing it like this so I must be on the right track.

Here is an excellent version of "Birria Estilo Jalisco" that is perfuming my kitchen at this very moment. It is wonderful.....

1 lb lamb stew meat (you can use goat, beef or pork)
1 1/2 lamb ribs, cut in 1-2 inch pieces
2-4 chiles de arbol, dried, de-stemmed and de-seeded
2 chiles pasilla, dried, de-stemmed and de-seeded
2 chiles anchos, dried, de-stemmed and de-seeded
3-5 garlic cloves, peeled, roasted
2 lb tomatoes, roasted
1/2 large onion, cut in large dice
5-7 large peppercorns
1/2 tsp thyme
1/2 tsp oregano
1/2 tsp ginger
1/2 tsp sesame seeds
2 oranges, juiced
1/2-1 cup white vinegar (optional)
salt to taste
lard or oil for frying, your choice

Garnishes:
1 large onion, finely diced
2 tbl oregano, dried and crushed
2 tbl cilantro, finely minced
2-4 Persian lemons, cut in quarters
Hot sauce, your choice (optional)
Fresh tortillas

All the dried chiles are roasted on a dry pan until fragrant, turning. Then they are placed in a large bowl and covered with hot water where they will remain until soft. You can do this in a pot on top of the stove and simmer gently for at least 1/2 hour, test and decide if more simmering is needed. Roast the garlic and the tomatoes and place them along with the softened chiles into a blender (save the soaking liquid) along with the spices except for the marjoram. Add the orange juice and vinegar if using. Process very well and then run through a sieve (so no seeds or anything else is included) and in a large pot (I use a pressure cooker) with 2-4 tbl of lard or oil, brought to a hot temperature, you add the sauce and you cook it slightly so it's not completely raw.

To the sauce you will add the meat and the marjoram. The traditional way is to stop at this point and allow the meat to sit in the sauce overnight. I skip this step and proceed to cooking, your choice to wait or not but I don't feel it's truly necessary. You cook the meat until it is soft. About 30 min in the pressure cooker for me, might be 1-3 hours of regular cooking and some people bake it in a 375 degree oven, covered with foil really well too. Just watch it so it doesn't go dry and add chicken stock or make additional sauce to have on hand.

Have the garnish ingredients ready when you are going to serve since these are used as needed as a topping for the "Birria" which is traditionally served in soup bowls, with the toppings, hot tortillas and cold beer for a taste of Jalisco!
***************************************

Chalupas.- Nothing says "Puebla" to me like these little wonders. Nothing fancy, very simple... yet full of flavor and tradition. If you're in Puebla, go to "Memelas en la Calle 3", the best in town!

1 lb masa dough (you can make your own or store bought)
1/2 lb shredded pork meat
1/2 lb shredded chicken meat
1 cup pork lard (manteca, yes.... won't taste the same)
1 onion, finely diced
2 cups Salsa Verde
2 cups Salsa Roja


Salsa Verde:
2 tbl manteca
1 1/2 cups green husk tomatoes, clean
1/2 onion, cut in quarters
3-4 garlic cloves
1-2 tbl cilantro leaves
1-3 chiles serranos (optional and depends if you want it hot or not, for taste only use 1 serrano)
salt & pepper to taste

Salsa Roja:
2 tbl manteca
1 1/2 cups Roma tomatoes
1/2 onion, cut in quarters
3-4 garlic cloves
2 dried chile moritas (seeded and deveined / toasted and soaked in hot water to soften)
salt & pepper to taste

Make the sauces: Green: Put all ingredients except the lard, cilantro and salt and pepper in a pan, cover with water and cook until the tomatoes have changed color. Put everything in the blender, adding the cilantro and salt and pepper and blend well. In another pan, get the lard hot and then pour in the blended sauce and cook about 5 min on med-low heat. Reserve

Red: Once the dried chilies are soft, put all ingredients (except the lard, salt & pepper) in the blender and blend well. You might have to run through a sieve if pieces of the dried chile remain), in another pan put the lard and get it hot, pour in the salsa and add salt & pepper. Cook 5 min and reserve.

If the masa is not soft, add very little warm water and work the dough (adding very little water) until it's workable. Make small tortillas which are put on a "comal" (or large pan) with some lard on it, already hot; the tortilla is cooking so dribble some more lard on top, now put some sauce on top followed by meat and finally some onion; more hot lard goes on top right before serving.

Comes with half green and half red and while these are considered appetizers, I used to have these as dinner along with a big glass of fresh squeezed orange juice! MMMMmmmmm!!!!
*************************************

Tlayoyos.- Another traditional "tidbit" that is second to none when it comes to flavor!

3 lbs masa for tortillas (make your own or store bought)
1 lb peas
Salt to taste
2 Avocado leaves
1/2-1 cup lard or oil
Red Sauce
Green Sauce
1 lb fresh Mexican Cheese (Cotija for instance), grated

Cook the peas with a little salt and the avocado leaves until very tender, drain and process until a paste is obtained. Add a little lard and mix well. Work the masa well until it's soft yet firm and make small tortillas which are filled with the pea paste, you fold so the filling is well encased and they look like elongated half moons.

Cook in some lard in a hot pan until golden and serve covered with sauce, half in green sauce and half with red sauce and sprinkle some grated cheese on top. Enjoy!
**********************************

If you've read more of this blog then you know my penchant for "street food" anywhere in the world I happen to be, I love it! While Birria is not commonly a street food, Chalupas and Tlayoyos (or Tlacoyos as known elsewhere) are most definitely along with about a millions other offerings. I was talking to Rene about all this while typing and we recalled our favorite places while living in Puebla and we remembered "Sushi Itto", if you're ever in Puebla, make a point of going there to sample some of THE best sushi anywhere. They do a fussion of Japanese and Mexican ingredients that is not only flavorful but perfectly paired to deliver amazing products, you'll see! But do make a point to walk around the downtown area of Puebla and see the sights along with tasting the incredible traditions that this city/state offers the world, it's worth the trip...... Do use the search bar on top and look through all the Puebla info posted here..... Talk soon!

Saturday, February 5, 2011

Finally some time to sit and reflect..... and cook too!


Moving is all over with and we're finally installed in our new place. It's been so surprising to all of us to feel and see the momentous differences between the East Side of town and the West where we now make our home and it's affected us all in positive ways.... kind of like finding a place where you belong and comfortable again, and it is. Definitely a good move but it took it's toll on all of us, even though we thought we'd rested, we hadn't and it showed in this last week's daily grind, we just couldn't get our energy back and we dragged all through the week.... until it came to Friday afternoon when we collapsed, exhausted and not being able to even move.....

But today is Sunday morning and we're feeling much recharged and much, much better. School is still good and our grades reflect it. YAY! It's been a punishing week with complicated dishes on the menu but came out of it with flying colors and very tasty food to enjoy. I've still got some Roast Duck in the fridge whispering to me.... except in school the sauce was "au natural" while I cooked up some Orange-Tamarind Glaze instead to pump it up. It was awesome and lent just the right touch of sweet/sour to hit your taste buds in the right way. MMMmmmmm!

Something amazing happened to me Friday at school when talking to one of my Instructors at Le Cordon Bleu when discussing sauces, come to find she loves Mole and she was surprised I make my own (but of course!...) and one thing led to another and discussing Mexican Food I come to find that she had been a customer of mine at "Quinta Belina"! Amazing! (yes, she was very impressed....). More amazing is that I still run into people sometimes that remember our little place and were customers..... so satisfying and a great ego boost as you can imagine. Anyway, made my day.....

More than ever and as I delve more into the French way of things since the school is all French technique that I find my appreciation for good and authentic Mexican Food grows. There is also a sadness there when I realize that it's not easy to find and what there is mostly a poor version and people come to believe this is what Mexican Food is.... You'd think that with all the Mexicans in the US we would have better representation, right? But it seems they get amnesia as soon as they cross the border! So it's up to those of us that believe we need to present, maintain and conserve the true cuisine of Mexico, done the old way following the classic preparations and techniques along with whole, natural ingredients so we can show how wonderful our food is and why we can't let it die out. Heavy duty Mexican Food is where it's at.

Yesterday at school it was Canard Poele Aux Navets or Roasted Duck with Turnips, and while it was scheduled to be served with a natural sauce, I was given permission to improvise and so I came up with a sweet apple cider vinegar glaze that had citrus undertones and was absolutely perfect with the richness of the duck. Also made Sole Meuniere which was amazing yet to me, it doesn't hold a candle to my very favorite, duck. I got an extra duck to bring home and while I was debating whether to make Duck Confit or another roasted duck, I settled on a crispy skinned duck with an Orange-Tamarind Sauce plus a Duck Mole with hints of Cinnamon, Cumin and Cardamom. As I write this the aromas of the sauces waft over the kitchen giving us anticipatory feelings of our soon to be devoured meal...... I love food!

So, going back to Mexican Food and that Mole I created I thought you'd appreciate a different take on this classic dish. Don't worry if you don't like duck (OMG!) since you can use Chicken, Turkey or even Pork instead, ok? Make enough so you'll have leftovers to use later with "Enmoladas", Nachos, Chilaquiles, over refried beans, on top of Huevos Rancheros, as a dipping sauce, with potatoes......

For those of you that think Duck is not a very Mexican ingredient to use in this dish let me tell you that our Spanish invaders found Mucovy Ducks happily living in Mexico when they got here, the Europeans had a larger duck type to use for foi gras and the smaller one was replaced by a larger species from Spain. You'll find plenty of duck recipes in Mexico (I've got a great tamale recipe I'll post soon) but turkey was used mostly in Mexico so Mole was originally conceived with wild turkey, the bird guys, not the drink, ok?

Mole de Pato (Duck Mole).- A rich sauce for a decadent dish.... satisfying and amazing!

1 Duck, rinsed and pat dry (you can use whole, thighs & legs or magrets)
Sat & Pepper the outside well

For chicken:
1 large chicken, cut up
About 8 cups of water
1/2 onion, in quarters
3 garlic cloves, peeled
1 celery rib, cut in half
salt to taste

Sauce:
6 mulato peppers
4 ancho peppers
6 pasilla peppers
6 whole cloves
1/2 teaspoon black peppercorns
1/4 teaspoon coriander seeds
1/4 teaspoon anis seeds
1/3 cup sesame seeds
2 inches of a stick of mexican cinnamon
1/2 cup of raisins or prunes
1/2 cup almonds, peeled
1/3 cup of raw pumpkin seeds
3 small roasted tomatoes
3 garlic gloves, peeled & roasted
1 large ripe dark-skinned plantain, peeled, thickly sliced (or more, to taste)
1/2- 1 cup smooth Peanut Butter, optional
1/2- 1 cup sugar, optional
1 Tablet of Mexican Chocolate (Ibarra or Abuelita Brand), cut in pieces
Chicken broth from cooking chicken or make your own
1/2 cup of oil or lard to fry the ingredients
Salt to taste

If using the duck, stab it with a knife all over (little holes so fat will drain out) and place on baking pan in 400 degree oven and cook until done or 170 degrees with a thermometer. About 1 1/2 hours. Baste with the fat in the pan after 45 minutes and about every half hour after that to crisp the skin. If you're using duck then don't use lard or oil for any of the steps below, use the rendered duck fat to add more flavor (or save for french fries...OMG!)

If using chicken or turkey: Put the ingredients in a large pot, cover with water and cook, simmering until done, about 45-60 min. Skim foam off the top as you see it, keep it clear.

If using pork, cut it up in cubes and sear until golden brown in a pan with a little lard or oil over med-high heat. Reserve.

To make the sauce: Take the dried chiles, split them open and remove the stem, seeds and veins, flatten down. In a large pan on the stove, over med heat, toast the chiles (you could dip them in oil if you wanted to) until fragrant, turning so both sides get done. Once done, place them in a bowl or pan with hot water and allow them to soak until they are soft, about 1 hour or so. Toast all the spices in the pan until they become fragrant, turning them to prevent their burning. If you have a food mill or coffee grinder, once toasted grind them well and reserve in a bowl until ready to use them. In the pan with a little oil in it, roast the fresh produce like the tomatoes and garlic, you can throw in the raisins or prunes here too.

Now, in your blender, place the soaked chiles along with their soaking liquid and blend them until you obtain a smooth puree. Then you will add the toasted and ground spices to this, incorporating so everything is smooth and velvety. Then add the tomatoes, garlic and plantain. As you blend things and need to empty the blender glass, add more stock as you need it to help the blender along, have a large pot ready with a little lard or oil (unless using duck) over med heat ready to receive the smooth puree, add to this as ingredients are processed and mix, mix, mix.

The plantain is here to thicken and lend some sweetness to the party, while the peanut butter adds a nutty undertone while thickening as well. Depending on your preference, you can add more or leave without, but a lot of people thicken mole with toasted tortillas or pieces of bread and to be honest, these don't inspire me since they don't bring much flavor. I also don't like to thicken my sauces with flour or other "thickeners" as a rule if I have something that can thicken naturally while imparting their own flavors and textures.

You should have a thick like paste at this point that needs to be fried in the pan with lard, oil or duck fat. Mix, scrape off the bottom and be sure you cook it well. You will have something akin to a bubbling cauldron by now, taste it again so you are sure you're on the right track, you can add some of the reserved chicken broth to get the consistency you need, thick so it's really coats the back of a spoon and has "body". Now add the chocolate if you want and mix to allow to melt. You should be tasting all the while so you know whether or not you will be wanting to add more chocolate, some sugar or not, more plantain, peanut butter, your choice.

You need to let this sauce come together, over very low heat, mixing every now and then so it doesn't burn or stick on the bottom. Adding more broth if you need to and tasting. Once the duck is done, allow to rest and split it in 6-8 pieces, reserve the back portions which you will put in the sauce as it cooks to give it even more flavor. If you're using Pork, now is the time to add it to the sauce and let it finish cooking along with the sauce. The meat will release juices which will flavor the sauce. Let the meat get very tender before eating, ok? Or you can use a pressure cooker to speed things along. Allow this to cook at least 1 hour (or more in a regular pot, the pressure cooker will be less) or come to this point and turn off the heat, save it and finish it the next day to allow for even more flavors to come through. This gets better with age and turns into "recalentado".....

When I made this in Puerto Vallarta I used a huge "cazuela de barro" (glazed terracotta pot) which is THE thing to use with wooden spoons, it also allows more flavors to develop and the glazing makes them better than non-stick while being great heat retaining vessels. My neighbors would walk by to try and guess what was cooking on the three large cazuelas bubbling in my outdoor kitchen (usually Asado de Boda Zacatecano, Mole y Salsa de Cacahuate).... aromas of our homeland, fragrant and full of flavor!

Your sauce will gel and become a paste which you can then store for future uses like Enchiladas or whatever, all you need to do is add some broth to it for it to come back. It keeps a long time in the fridge so you have an amazing meal ready in no time at all. Or you can freeze in individual servings (zip lock bags) so you can just boil in hot water or nuke it and an ordinary meal becomes extra-ordinary. This will be amazing!

Now make a lovely Frisee salad with a nice vinaigrette, some crisp veggies and some rice pilaf and you've got one incredible meal! Impressive for company but a guilty pleasure for a night of staying in.....

I hope you will at least try this one time so you can see what I'm talking about.... There are so many variations to mole you'd have a hard time keeping up with all of them, but it's fun to try. I've got some incredible fruit based moles which I'll share soon too. But in the meantime, savor every spoonful.... talk soon....

Saturday, October 9, 2010

The Word for the Day is "FLAVOR"......... MMmmmm!


I'm sitting here, talking to you while having some coffee and a piece of the New York Cheesecake Rene made Thursday, Mmmm rich and creamy with a hint of orange.... lovely (the only reason we still have some is that it must cool overnight before being consumed! He's really been into polishing his cooking skills since we decided to go to Culinary School), but it helps organize my thoughts, while putting together the ingredients of what will surely be a great evening meal..... I've always believed that anticipation is the key.....

Inspiration is funny. Sometimes I think one thing will be done and while looking through the old chill chest for the makings of it, I am taken on a totally different direction by a surprise ingredient. I love that! Regimented or predictable meals for some reason don't appeal too much to me and spur of the moment inspiration has given us some wonderful kitchen moments... I should also add that it helps having a wildly eclectic larder to chose from....

I had bought a large package of Won Ton Skins the other week when we were in the mood for Potstickers (which were really great by the way) and had quite a few left over, lurking in the door of the fridge wrapped in plastic, and all of a sudden tonight's meal came to me... Zap! Fond memories of trips long past came flooding into my mind while my taste buds told me I was on the right track. Plus, if you consider that using the wrappers instead of having to make the pasta from scratch will shave lots of time and make this a fast meal..... Add a salad and you're done. Ready, Set.... Go!
Ravioli..... a simple yet complicated little item that can be the simplest thing or can be taken all the way into the stratosphere. You can decide how basic or elaborate you want to get and it's another great "clean out the fridge" type meal since you can use leftovers for the filling and make them in all flavors. You can also have them as appetizers, a heavy meal, vegetarian, fried or tender, something delicate or even a decadent dessert. With so much flexibility how can you go wrong.

Based on the leftovers I found, our Raviolis would be in two flavors plus the dessert ones. For the main meal I found some leftover Moroccan Bastiya filling made with Ground Lamb, infused with cinnamon, almonds and raisins plus a little Ricotta and Ham, except that in order to make it different I will turn the Cheese and Ham one's into Tortellinis instead, so it will make it a totally different dish. For the dessert Raviolis it would be Nutella and Ricotta Apricot fillings.

Don't think that this will be a hard project, not at all. The meat Raviolis will be used flat, one square on the bottom with a teaspoon of filling in the center, topped with another square, then sealed. That's all. The Tortellinis are just as simple. Take a square of pasta and place the filling almost in the center, then fold over the top corner to make a triangle and seal. Now join the two points from the long side of the triangle and pinch together so you have a ring with the other point sticking up, right? Now fold the point that's sticking out back and down. Done! You've made Tortellinis. Don't forget Raviolis don't need to be in a particular shape either, it's your choice. Just make sure to press any air that's in the filling out so they will seal really well and put some water around half of the edges so they will stay closed.

You can use any sauce you like. (Another great way to use those leftover sauces sitting in the fridge) Traditional ones of course are Marinara, Tomato and Basil, Spicy Arrabiata, Pesto, White Cream Sauce (with Wine or not), Vodka or Cheese Sauce or Butter and Sage. Whatever you like is great. Or you could simply toss in good Olive Oil or Butter (Brown? Clarified?) and top with grated cheese. They can also be fried in oil and are great like this too, especially the dessert ones. YUM! These you can sprinkle with powdered sugar, cinnamon or serve alongside ice cream......

To finalize all this information: The Lamb Bastiya Raviolis will be accompanied with a Butter and Sage Sauce since the filling is rich and heavy with full flavor notes of cinnamon, almonds, raisins and the lamb. A salty, sweet, spiced combination that needed some mellowing and doesn't need any more flavors added to it so the Butter Sage Sauce will accomplish this nicely. The Ricotta, Garlic and Basil Tortellinis will have the Ham and Peas Cream Sauce to finish them off and the the dessert ones will get a different treatment: These I will fry until crispy and golden. Topped with fried mint leaves and powdered sugar and maybe served alongside ice cream.

Tortellini Cream Sauce.- A great basic sauce you can use on all things.... Worth geting familiar with since it will always be handy to have around.... You can omit the ham and peas and use it with wine instead of the cream and some Nutmeg or flavor it any way you like.

2 ounces Prosciutto (or ham)
1 tablespoon flour
2 tablespoons butter
1 cup milk
1/3 cup heavy cream (you can use half and half if you like)
Salt and pepper to taste (depends on your ham and taste)
1/2 - 3/4 cup fresh green peas
Grated cheese to taste

Make a bechamel sauce by melting a tablespoon of butter and stirring in the flour with a whisk to keep lumps from forming. Cook until the mixture is a pale brown, then add the milk, a little at a time, stirring constantly. Continue cooking over a low flame until the sauce thickens somewhat, then stir in the cream, heat through, and set aside. Meanwhile, set the pasta to cook in salted water. Shred the ham and lightly saute it in a large skillet with the remaining butter. Add the peas to the prosciutto and cook for a couple of minutes, add the bechamel sauce and keep the sauce warm. When the pasta is almost done, turn the flame under the sauce to high, drain the pasta and finish cooking it by tossing in the sauce. Taste to adjust salt and pepper. Serve with grated cheese if you like.
**********************************************

Here's the recipe for the Dried Apricot and Amaretto Dessert Raviolis.- An easy and wonderful dessert that will please everyone! Fantastic for the holidays too!

6 ounces dried Apricots, chopped
1/4 cup Amaretto di Saronno
4 ounces cream cheese (1/2 a package), softened
1/2 - 1/4 cup nuts (walnuts, almonds, pistachios.... your choice), chopped
6 ounces white chocolate, melted (you could use dark too)
1/2 teaspoon cinnamon

Soak the dried apricots in the Amaretto for abut half and hour. Drain the fruit well but reserve the Amaretto, you can use it for coffee later... Put the apricots in a blender or food processor along with the cream cheese, nuts, chocolate and cinnamon and blend until it gets incorporated. It will look like a thick paste. Use just a little less than a teaspoon of this filling in each Ravioli.

Once you've assembled all of the Raviolis, insuring no air inside and that they're well sealed, put about 1/4 inch of oil in a pan over med-high heat and bring to temperature. Fry the Raviolis about 4 at a time, carefully so they don't burn but get golden. Turn. Drain in either a colander or on paper towels and sprinkle with powdered sugar. Best if served warm.
NOTE: I'm sure you can think of many, many other fillings you can use for these, right? Almost anything will be great, from marmalade, cheeses, fruits, etc. They don't need to be fried all the time either, your choice there too.
***********************************************

I'm done, I've got everything organized and just need for dinnertime to come around so I can throw it all together, this is another reason why using leftovers is great, it's all done plus recycling always makes budgetary and logical sense, right? Hope I've given you some ideas for great and easy meals to come. Take care and I'll be reporting back soon.....

Sunday, August 1, 2010

Sundays are great Brunch Days......

What can I say about Sundays? Day of rest (from what? not working means every day is Sunday for me! Sounds nice but can be boring after a while...)- day to get together with friends and family, make Sunday dinner a tradition for your family, day to be lazy and selfish, day to get your act together for starting a new work week......

Whatever Sunday means to you, or even if you make another day of the week into "your" Sunday if you work on this day- we can make it a great day..... Sunday just seems to bring out the relaxed in us for some reason, from the time you wake up and carries it all throughout the day; maybe it's the sleeping in, not hurrying through breakfast or just being able to have breakfast that makes it special. In any case, it's good for us to try and conserve this feeling all week long, don't you think?

For us, Sunday means Brunch with a late breakfast that will carry us until dinner time. After sunset brings a special kind meal to top off the week and recharge energies to get us going on beginning a new week. It doesn't mean you have to spend all day preparing and working, not at all. I've found that I can get organized well in advance and it's now become natural for me to think ahead, sometimes weeks in advance, when I initially go shopping (sparing shopping time and having to think on the spot and gas savings too) to include items I might like for the next weekend or so.... this way I've already got one or two things chosen.

It also makes sense during the week when making other things for our daily menu's, if it's similar or can be worked into your time schedule, to make advance steps that will save time and energy during the weekend. Maybe you can recycle leftovers that with little effort can be turned into a Brunch item or prepare items and save them in zip lock bags to save prep time later; since sauces store well these can be made in advance too; freeze things that might work later, many items can be done in advance (look at all the recipes you're considering to see which can benefit from advance planning- at first it might take more time and planning but once you get used to working this way it's a snap) and you'll love the time and work this saves you later. Makes planning something special very easy.....

Also, think that when making a particular dish for one day might mean that if you make extra, half can be stored or frozen for it's use on the weekend. It can used as a base for other meals by simply adding this or that, giving it a different spin and coming up with an altogether different meal! Even pieces cut from vegetables, trimming meat or bones being prepared for one dish can be stored in zip lock bags and kept for the day when you need a soup, stock, sauce, chili, salad or ? You'll have less waste, save money and time.

I'm sure you get the idea (or maybe all this just sounds like more work to you.... ) but it will save time and money, really. The trick is to change your mind set and think in advance, but it does mean to give a spin in how you look at things.

Here are some great dishes you can incorporate into your Brunch or Family Dinner.....

Artichokes with Roasted Garlic Aioli.- A great appetizer or light lunch. We love the flavors here and have it often!

1 egg yolk
1 tsp white wine vinegar
1 tsp Dijon mustard
1 cup grape seed oil (I use olive oil usually)
1 head garlic, roasted (see note below)
Salt and pepper
Lemon juice to taste
12 baby artichokes (poivrade variety, which are the tiny ones)
1 to 2 lemons
2 to 3 tbl olive oil

Make the aioli: Beat the yolk with the vinegar and mustard. Whisk in the oil, drop by drop, to make a thick mayonnaise. Squeeze the garlic out of the roasted cloves into the mayonnaise and whisk smooth. Season with salt, pepper, and lemon juice, to taste.

Prepare the artichokes: Trim the artichokes, rubbing with lemon as you go, until you are down to the core with a bit of stem attached. Halve. While you’re trimming, bring a pot of water to the boil. Squeeze the juice of a lemon into it and salt it. Drop in the artichokes and cook until tender, about 10 minutes, depending on the size. Drain, and pat dry. Heat the olive oil in a skillet and brown the artichokes on all sides. Transfer to paper towel to drain. Serve with the aioli.
NOTE: To roast a head of garlic, wrap in foil with about 2 tsp olive oil and bake for an hour at 350F.
I also stretch the aioli even more by adding either heavy cream or sour cream (or creme fraiche too), to "loosen" it up and then turn it into a dressing which I use with salad, vegetables, as a dipping sauce, over fish or chicken or you name it.... it's wonderful!
*******************************************

Lovely Watercress S
alad.- How about this for a change? It's great! (I also use this salad in place of lettuce on all kinds of sandwiches, fantastic!)

4 handfuls watercress, with the stems trimmed, rinsed
Extra virgin olive oil to taste
Champagne vinegar to taste
Salt and pepper
2 handfuls small green grapes
1 handful slivered almonds, toasted

Toss the greens with the oil, vinegar, salt and pepper, to taste. Arrange on a serving platter and scatter over the almonds and grapes. Serve.
**********************************************

Belge-Ette de Veau (Belgian Veal Stew).- Belgian counterpart to the French version but very similar, truly comfort food. Don't like or want veal? Use pork!

4 lbs veal shoulder, cut in into chunks
8 cups chicken stock
1 boquet garni (see note below)
1 carrot
1 onion, poked with 2 cloves (just insert them into the onion and drop in)
Salt and pepper
5 tbl butter
12 oz small cremini or button mushrooms
3 tbl flour
1/2 cup crème fraîche (or half sour cream, half heavy cream)
A few handfuls of finely chopped parsley for garnish

Bring a large pot of water to the boil. Salt it, and blanch the onions one minute. Remove and set aside. In the same pot, blanch the meat four min. Drain, and rinse under cold water. Put the veal in a pot and cover with all but 1 cup of the chicken stock. (If you need more liquid, add water.) Drop in the bouquet garni, carrot, and clove-studded onion. Bring to a boil, reduce the heat, and simmer very gently, uncovered, 1 to 1-1/2 hours. (I make it in the pressure cooker and it takes all of 30 min....! I cook the entire dish in there and makes for less cleanup)

While the meat cooks, peel the blanched onions. Melt 2 tbl of the butter and gently fry them together with the mushrooms until golden, about 5 min. Pour over the remaining cup of stock and cook until tender and all the liquid has evaporated, about 10 min. Set aside.

When the meat is very tender, but not falling apart, remove from the heat. Discard the carrot, onion, and bouquet garni. Strain the liquid into a saucepan. You should have about 2 cups: if you have more, simply boil to reduce over med-high heat until you get the right volume. Set the meat aside with the mushrooms and onions and keep warm.

Melt the remaining butter in a saucepan. Whisk in the flour and cook one minute. Pour over the cooking liquid and simmer to thicken, about 10 min, skimming off any film that rises to the surface. Add the cream, season with salt and pepper, and pour over the meat. Gently reheat, transfer to a dish, scatter of the parsley, and serve.
NOTE: The bouquet garni is a bundle of herbs usually tied together with string and mainly used to prepare soup, stock, and various stews. The bouquet is boiled with the other ingredients, but is removed prior to serving. There is no generic recipe for this, but most recipes include parsley, thyme and bay leaf. Depending on the recipe, it may include basil, burnet, chervil, rosemary, peppercorns, savory and tarragon (my favorite!)....
-You can also add or substitute other vegetables for the ones here, follow your taste.
*******************************************

Meringue and Almond Cake.- Rich yet light and full of wonderful almond flavor..... It's also one of the prettiest cakes you'll see....

4 oz almonds or hazelnuts, finely ground
1 tbl cornstarch
1/2 cup sugar + 1 tbl sugar
4 egg whites
1/2 cup + 2 tbl sugar (for the butter cream)
4 egg yolks (for the butter cream)
1 cup butter, very soft (for the butter cream)
1 tsp vanilla extract (for the butter cream
1 cup slivered almonds, toasted (for the topping)
6 peaches, sliced thin, unpeeled (for the topping)

Make the cake: Heat the oven to 275F. Line two baking sheets with parchment and draw on two 9-inch. (You could also do rectangles). Combine the ground almonds, cornstarch, and all but 2 tbl of the sugar. Beat the whites to peaks, then beat in the remaining sugar to make a stiff meringue. Fold in the almond mixture in three batches to combine thoroughly but gently. Using a piping bag with a large tip, (or use a plastic bag with one of the bottom corners cut off) pipe the meringue onto the circles on the parchment. (so it looks like a thick white cord coming out, start on the center and work in a spiral, making it larger as it goes until you end up at the edge of the circle you drew on the paper) Bake until crisp and dry, about an hour and a half. Keep watch on it so it doesn't burn and get only slightly golden.

Make the butter cream: Heat the sugar with 1/3 cup + 2 tbl water to dissolve, then boil to soft-ball stage, which is just before the syrup changes color (239F on a candy thermometer if you're using one). Beat the egg yolks with a mixer, then, with the beaters running, quickly add the hot syrup in a thin stream, a little at a time. Continue beating until the mixture is cool and forms and thick mouse, about 5 min. Beat in the butter, gradually, and finally add the vanilla.

Assemble the cake: Set a round of meringue on a serving plate. Spread over a quarter of the butter cream. Lay in a layer of sliced peaches. Spread the top layer with butter cream and set it on top on the first. Spread the remaining butter cream over the sides of the cake. Press the toasted almonds all around the sides. Arrange another layer of peach slices on top.
NOTE: You can use other fruits for this as you like, but I've found that stone fruits work best.
*******************************************

"The 44" - Orange - Coffee Drink.- Sounds strange but tastes great and packs a punch! You really need to plan ahead for this one.....

1 large organic orange, well washed
44 coffee beans
44 sugar cubes
4 cups vodka

Poke the orange with a skewer or knitting needle and insert the coffee beans through the slits in the skin into the orange flesh. Put the orange in a sterilized preserving jar (with an opening large enough to fit an orange through), add the sugar, pour over the alcohol, seal, and shake. Store in a cool, dark place, giving the jar a shake every day for 44 days. Filter the liqueur through a coffee filter into a serving bottle.
NOTE: This recipe is for one jar or bottle that will accommodate 4 cups, if you want to make more then adjust the recipe as needed. I make all my home made liquors (kahlua, flavored vodkas, galiano, etc. about twice a year but in Sept/Oct for sure so they will be ready for Xmas since they make fantastic gifts and nice to gave during the holidays. More recipes under "gifts" section.
************************************************

Better Citron Presse (Lemon Beverage).- A popular beverage served in bistros which you can turn into a great aperitif....

2 cups sugar
Peel from 2 lemons, julienned
2 cups water
mint springs
Vodka

To make lemon syrup: put the sugar and lemon in a saucepan with water. Bring to a boil just 5 min. Remove from the heat and cool. Store in a glass jar in the refrigerator. Put 1-3 tbl of lemon syrup in a glass with a few ice cubes and a sprig of mint. Squeeze in the juice of half a lemon. Stir in 1 oz vodka, add cold water to lighten. Sweeten with more syrup, if you like.
NOTE: This can be non-alcoholic or with vodka if you like. You can also use sparkling or soda water if preferred or Lemon-Lime soda.... your choice.
*****************************************

I'm waiting for the guys to settle in before serving, we decided to leave the main dishes shown here for dinner yet we'll be having the artichokes and some crusty Bruschettas made with home made baguettes (Yay! so good!)..... here's the drill: Shredd Mozzarella, chop black olives and have ham and slices of tomato, basil leaves and onion on hand.

Mix the mozzarella, olive oil, vinegar, oregano, onion and black olives. Mound the mixture on the cut side of the baguette halves. Bake at 425 F for 8 - 10 min or until bubbly and golden.

Remove from oven and lay sliced tomatoes, basil leaves and ham over baked sandwich and serve. Amazingly easy and good! Hope you enjoy it, talk soon......

Sunday, July 25, 2010

Our Daily Bread..... French Bread At Home!

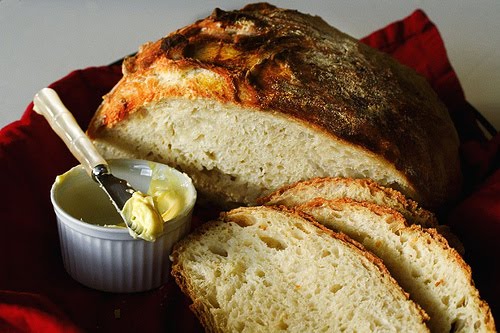
If you read yesterday's post then you will find this is the continuation of my two part post starting with BBQ Baby Back Ribs and then progressing on to using the leftovers and turning them into Baguette Pulled Pork Sandwiches..... I'm here to report that all the work that went into the making of the French Baguette's was rewarded with wonderfully crusty loaves that we all enjoyed.....YAY! The picture at left describes the "heavenly aroma of bread baking in the kitchen" (insert heavenly music here too! lol).....

Now you'll think that it's kind of nuts to try and recreate French bread at home. That it's hard and wouldn't yield the results that would make all the work worth the project BUT I can report that absolutely the results are worth the trouble! I will list all the steps you need to produce great Baguettes (or other shaped bread if you want) so please don't be turned off by the whole procedure- sure, it's kind of long but again, it's not hard, it's just work that anyone can do. I will also give you "no knead" bread instructions you can try that is easier still to produce bread at home, ok?

First things first so here we go!............... I used the leftover Baby Back Ribs and peeled all the meat off the bones (we only ate half), used the leftover BBQ Sauce used for the ribs and heated up the shredded meat with the sauce (if you didn't have enough left over sauce you could add more tomato sauce and more Chipotle)......

French Baguette Bread Using Your Home Kitchen and American Ingredients.- Try it and you too will be won over by the fantastic results!............ Don't skip the rest periods mentioned, the dough / gluten needs these....

3 1/2 cups all purpose flour (unbleached is also great)
1/3 cup warm-hot water (for the yeast)
1 package Rapid Rise Yeast
2 1/5 tsp Kosher Salt
1 1/4 cup warm or tepid water
2 tbl cornmeal (for baking sheet)

You will need a clean spray bottle that can spritz a mist of water.
You will also need a 24 inch long piece of sturdy cardboard or plastic to transfer the bread from the towel onto the baking sheet or something that will work for this.
You will also need a razor or very sharp straight knife to cut the bread.
You will need to have a timer close at hand.

In a small bowl or glass put the 1/3 cup heated water with the yeast and let it rest for at least 10 min and make sure it's bubbling before using to insure it's active.

In a large bowl put the flour, salt, yeast and 1 1/4 cup water and mix well, first with a spoon until well combined. Put this onto your board or work surface (you can put some flour here to prevent sticking but not too much) and let this rest 2-4 min. After resting, knead the dough well (by kneading with the heel of your hand and then throwing onto the board) for at least 10-15 min. The dough should be tender and soft. Let rest at least 2 min before proceeding. If dough not tender, knead more until smooth. Get a large bowl or dish with vertical sides (so the dough will rise up not out), oil it so dough doesn't stick while rising and put in the dough and cover with plastic wrap until it grows 3 times it's size. This should take at least 3 hours and the bowl should be placed at 75 degrees and not hotter so it rises slowly allowing the dough to develop flavor.

Once it's risen, turn onto your board or work table and gently deflate (no punching down here) with floured hands, flip to the side, fold over and place back in the bowl (cleaned up and re-oiled) seam side down, cover it up again and allow it to rise, at 75 degrees, to 3 times it's size for another 3 hours or more.

Once it's risen again, put onto your board to form the loaves. Cut the dough into 3 equal parts, fold each part in half and let them rest for 4-5 min. Now take one piece and pat it out to form a 6-8 inch circle, fold over 1/3 of the way and pat down with the heel of your hand and make an indentation with the side of your hand (like a canal), fold in half and turn over so the flat, even bottom is seen. Roll out this dough with both hands to form a long snake about 24 inches long, over a little flour to prevent sticking- and place on a floured towel or paper. Do the same to the remaining 2 pieces of dough until you've got 3 "long snakes" lying side by side on a towel or paper. Again, these should rise to 3 times their size in 75 degree temperature. About 2-3 hours or more....

Preheat your oven to 400 degrees. Place one rack on the bottom and another on the middle of the oven (you will need both). Put some cornmeal down on a baking or cookie sheet you will use to bake the bread to prevent sticking. Have your spritzing bottle ready with water.

Take your cardboard piece and put next to one of the loaves, flip the bread onto the cardboard carefully so it doesn't stick, the bottom will now be the top and be smooth and place on the baking / cookie sheet that's been sprinkled with cornmeal to prevent sticking in the oven. Do the same for the other two loaves. Now take your razor and cut the loaves, slightly diagonal in 3 "slashes", one on top, another in the middle and another on the bottom. Cuts are about 4 inches in length and will allow the bread to expand and give the look you want. Now spray the loaves lightly and put the baking sheet on the BOTTOM rack in the hot oven. Set your timer for 2 minutes.

When the timer sounds, open the oven and mist the loaves lightly again. Set the timer for another 2 minutes. Mist the bread again when the timer sounds and set the timer again for another 2 minutes. Mist again and set timer for another 2 minutes. When it sounds again you are on minute 6 of baking, at this time move the baking sheet to the middle rack in the oven I told you about, ok? Mist again with the water and set your timer for 14 minutes. When your timer goes off this will give you 20 minutes of total baking time, right? At this time you will take one of the loaves, turn it over and hit the bottom of the bread with the tips of your finger and "thump it", you should hear a hard, hollow sound (great, isn't it?) and it sounds as if the bread is done. Is your kitchen's aroma great? It should be.....

Your bread is not done yet. Consider this: Are the loaves golden brown and not yellow? If they are then turn the oven off and let the bread sit in the oven for an additional 5 minutes so the inside of the bread can loose the humidity and finish baking. If the loaves are still pale yellow then set your timer for 3-5 minutes (watch them) until they are golden brown, then turn off the oven and let them sit for another 5 minutes in the turned off oven. OK?

Now your bread is done but still hot. It will soon cool and then you will be free to enjoy your lovely bread as you prefer. Congratulations, you've made some great tasting bread!
NOTE: Don't want baguettes? That's ok, you can shape the dough into rounds or just one big loaf if you want or you can cut into it with scissors and make it into a tree or whatever shape you'd like. Maybe you'd want individual rolls or sandwich ovals.... go ahead, it will still taste just as great!
*****************************************

Here are the instructions for "NO KNEAD BREAD".- Easy and great too! I've also seen YouTube videos on something similar in case you need to "see" the instructions.....

3 cups bread flour
1/4 tsp instant yeast
1 tbl table salt
1 1/2 cups warm water

You will need a heavy pot with a lid that can take a hot oven (450 degrees) like a dutch oven.

Put all ingredients into a bowl and mix well. It will look like a mess, lumpy and uneven. Don't worry, it's supposed to look this way. Cover the bowl with plastic wrap and set it in a warm place for at least 12-20 hours. I usually do this before going to bed or after dinner.....

In the morning it will have holes and bubbles and will have risen. Now wet your hands to prevent sticking. Don't use more flour, only a little on the table, since you want to keep it down. If it's sticking, wet your hands again. Roll into a ball, tucking the ends underneath so you get a smooth ball on top when you fold the ends under and the surface is taut, place on a floured towel in a bowl and allow to rise for 1-2 hours and will double the size.

Put the pot into the 450 degree oven and pre-heat. Pot must be hot. When dough has risen, put the dough into the hot pot. Shake the pot to even out the dough and cover. Bake 30 min. Then uncover and bake for another 15-20 min so it's golden brown. Tap it, it should sound hollow. Let it cool and enjoy!
NOTE: If you're not planning on eating this bread soon after baking, the crust will soften and you will need to re-crisp the crust by putting in a 350 degree oven for about 15 min. This is due to the high water content of this dough and a thin, crispy crust but makes a nice bread.
******************************************

You now have some nice options for home-made quality bread. We had baguettes, used the leftover meat and sauce and the sandwiches were more than excellent! Amazing! Also, you might think that Baby Back Ribs were expensive but they were on sale (which is why I bought them), I spent $3.43 per serving and we had 6 servings over two days, which is more than good eats! You could also use more inexpensive cuts of meats for this if you like and lower the per serving price even more. The bread cost me $1.25 in ingredients, so .41 cents per serving there.

All in all I would say that fits into my budget giving you 6 restaurant quality meals...... I can also add that we had a little BBQ meat left (there was so much!) that will be turned into gourmet pizza's today along with some chicken thighs from the other night, so two large gourmet pizza's (one with creamy green sauce and the other with spicy BBQ sauce) for dinner which will stretch our food budget more and use up all the leftovers! I got some boneless, skinless chicken thigh meat in a bag of 10lbs (yes, that's a lot but separated & frozen into 2 lb packages it works really well) and at .37 a pound will give us plenty of dishes to create.... We will be on the watch for more specials to take advantage of.... In the meantime, hope you try it and see.... talk soon....