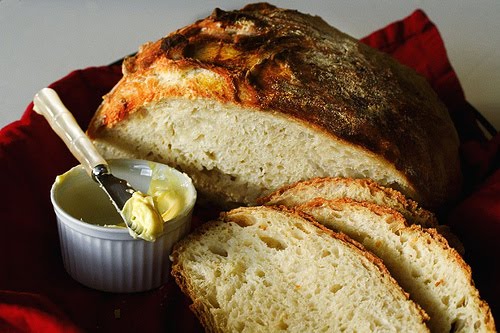
 If you read yesterday's post then you will find this is the continuation of my two part post starting with BBQ Baby Back Ribs and then progressing on to using the leftovers and turning them into Baguette Pulled Pork Sandwiches..... I'm here to report that all the work that went into the making of the French Baguette's was rewarded with wonderfully crusty loaves that we all enjoyed.....YAY! The picture at left describes the "heavenly aroma of bread baking in the kitchen" (insert heavenly music here too! lol).....
Now you'll think that it's kind of nuts to try and recreate French bread at home. That it's hard and wouldn't yield the results that would make all the work worth the project BUT I can report that absolutely the results are worth the trouble! I will list all the steps you need to pr
 oduce great Baguettes (or other shaped bread if you want) so please don't be turned off by the whole procedure- sure, it's kind of long but again, it's not hard, it's just work that anyone can do. I will also give you "no knead" bread instructions you can try that is easier still to produce bread at home, ok?
First things first so here we go!............... I used the leftover Baby Back Ribs and peeled all the meat off the bones (we only ate half), used the leftover BBQ Sauce used for the ribs and heated up the shredded meat with the sauce (if you didn't have enough left over sauce you could add more tomato sauce and more Chipotle)......
French Baguette Bread Using Your Home Kitchen and American Ingredients.- Try it and you too will be won over by the fantastic results!............ Don't skip the rest periods mentioned, the dough / gluten needs these....
3 1/2
 cups all purpose flour (unbleached is also great)
1/3 cup warm-hot water (for the yeast)
1 package Rapid Rise Yeast
2 1/5 tsp Kosher Salt
1 1/4 cup warm or tepid water
2 tbl cornmeal (for baking sheet)
You will need a clean spray bottle that can spritz a mist of water.
You will also need a 24 inch long piece of sturdy cardboard or plastic to transfer the bread from the towel onto the baking sheet or something that will work for this.
You will also need a razor or very sharp straight knife to cut the bread.
You will need to have a timer close at hand.
In a small bowl or glass put the 1/3 cup heated water with the yeast and let it rest for at least 10 min and make sure it's bubbling before using to insure it's active.
In a large bowl put the flour, salt, yeast and 1 1/4 cup water and mix well, first with a spoon until well combined. Put this onto your board or work surface (you can put some flour here to prevent sticking but not too much) and let this rest 2-4 min. After resting, knead the dough well
 (by kneading with the heel of your hand and then throwing onto the board) for at least 10-15 min. The dough should be tender and soft. Let rest at least 2 min before proceeding. If dough not tender, knead more until smooth. Get a large bowl or dish with vertical sides (so the dough will rise up not out), oil it so dough doesn't stick while rising and put in the dough and cover with plastic wrap until it grows 3 times it's size. This should take at least 3 hours and the bowl should be placed at 75 degrees and not hotter so it rises slowly allowing the dough to develop flavor.
Once it's risen, turn onto your board or work table and gently deflate (no punching down here) with floured hands, flip to the side, fold over and place back in the bowl (cleaned up and re-oiled) seam side
 down, cover it up again and allow it to rise, at 75 degrees, to 3 times it's size for another 3 hours or more.
Once it's risen again, put onto your board to form the loaves. Cut the dough into 3 equal parts, fold each part in half and let them rest for 4-5 min. Now take one piece and pat it out to form a 6-8 inch circle, fold over 1/3 of the way and pat down with the heel of your hand and make an indentation with the side of your hand (like a canal), fold in half and turn over so the flat, even bottom is seen. Roll out this dough with both hands to form a long snake about 24 inches long, over a little flour to prevent sticking- and place on a floured towel or paper. Do the same to the remaining 2 pieces of dough until you've got 3 "long snakes" lying side by side on a towel or paper. Again, these should rise to 3 times their size in 75 degree temperature. About 2-3 hours or more....

Preheat your oven to 400 degrees. Place one rack on the bottom and another on the middle of the oven (you will need both). Put some cornmeal down on a baking or cookie sheet you will use to bake the bread to prevent sticking. Have your spritzing bottle ready with water.
Take your cardboard piece and put next to one of the loaves, flip the bread onto the cardboard carefully so it doesn't stick, the bottom will now be the top and be smooth and place on the baking / cookie sheet that's been sprinkled with cornmeal to prevent sticking in the oven. Do the same for the other two loaves. Now take your razor and cut the loaves, slightly diagonal in 3 "slashes", one on top, another in the middle and another on the bottom. Cuts are about 4 inches in length and will allow the bread to expand and give the look you want. Now spray the loaves lightly and put the baking sheet on the BOTTOM rack in the hot oven. Set your timer for 2 minutes.
When the timer sounds, open the oven and mist the loaves lightly again. Set the timer for another 2 minutes. Mist the bread again when the timer sounds and set the timer again for another 2 minutes. Mist again and set timer for another 2 minutes. When it sounds again you are on minute 6 of baking, at this time move the baking sheet to the middle rack in the oven I told you about, ok? Mist again with the water and set your timer for 14 minutes. When your timer goes off this will g
 ive you 20 minutes of total baking time, right? At this time you will take one of the loaves, turn it over and hit the bottom of the bread with the tips of your finger and "thump it", you should hear a hard, hollow sound (great, isn't it?) and it sounds as if the bread is done. Is your kitchen's aroma great? It should be.....
Your bread is not done yet. Consider this: Are the loaves golden brown and not yellow? If they are then turn the oven off and let the bread sit in the oven for an additional 5 minutes so the inside of the bread can loose the humidity and finish baking. If the loaves are still pale yellow then set your timer for 3-5 minutes (watch them) until they are golden brown, then turn off the oven and let them sit for another 5 minutes in the turned off oven. OK?
Now your bread is done but still hot. It will soon cool and then you will be free to enjoy your lovely bread as you prefer. Congratulations, you've made some great tasting bread!
NOTE: Don't want baguettes? That's ok, you can shape the dough into rounds or just one big loaf if you want or you can cut into it with scissors and make it into a tree or whatever shape you'd like. Maybe you'd want individual rolls or sandwich ovals.... go ahead, it will still taste just as great!
*****************************************
Here are the instructions for "NO KNEAD BREAD".- Easy and great too! I've also seen YouTube videos on something similar in case you need to "see" the instructions.....
3 cups bread flour
1/4 tsp instant yeast

1 tbl table salt
1 1/2 cups warm water
You will need a heavy pot with a lid that can take a hot oven (450 degrees) like a dutch oven.
Put all ingredients into a bowl and mix well. It will look like a mess, lumpy and uneven. Don't worry, it's supposed to look this way. Cover the bowl with plastic wrap and set it in a warm place for at least 12-20 hours. I usually do this before going to bed or after dinner.....
In the morning it will have holes and bubbles and will have risen. Now wet your hands to prevent sticking. Don't use more flour, only a little on the table, since you want to keep it down. If it's sticking, wet your hands again. Roll into a ball, tucking the ends underneath so you get a smooth ball on top when you fold the ends under and the surface is taut, place on a floured towel in a bowl and allow to rise for 1-2 hours and will double the size.
Put the pot into the 450 degree oven and pre-heat. Pot must be hot. When dough has risen, put the dough into the hot pot. Shake the pot to even out the dough and cover. Bake 30 min. Then uncover and bake for another 15-20 min so it's golden brown. Tap it, it should sound hollow. Let it cool and enjoy!
NOTE: If you're not planning on eating this bread soon after baking, the crust will soften and you will need to re-crisp the crust by putting in a 350 degree oven for about 15 min. This is due to the high water content of this dough and a thin, crispy crust but makes a nice bread.
******************************************
You now ha
 ve some nice options for home-made quality bread. We had baguettes, used the leftover meat and sauce and the sandwiches were more than excellent! Amazing! Also, you might think that Baby Back Ribs were expensive but they were on sale (which is why I bought them), I spent $3.43 per serving and we had 6 servings over two days, which is more than good eats! You could also use more inexpensive cuts of meats for this if you like and lower the per serving price even more. The bread cost me $1.25 in ingredients, so .41 cents per serving there.
All in all I would say that fits into my budget giving you 6 restaurant quality meals...... I can also add that we had a little BBQ meat left (there was so much!) that will be turned into gourmet pizza's today along with some chicken thighs from the other night, so two large go
 urmet pizza's (one with creamy green sauce and the other with spicy BBQ sauce) for dinner which will stretch our food budget more and use up all the leftovers! I got some boneless, skinless chicken thigh meat in a bag of 10lbs (yes, that's a lot but separated & frozen into 2 lb packages it works really well) and at .37 a pound will give us plenty of dishes to create.... We will be on the watch for more specials to take advantage of.... In the meantime, hope you try it and see.... talk soon....
No comments:
Post a Comment